If you have multiple brands set up on your helpdesk, it's likely that you will want your email templates to be brand-specific.
To do this, you can just create separate emails per brand. Or alternatively, it's possible to add arguments to your templates to send out different content depending on the brand the ticket belongs to.
Brand IDs
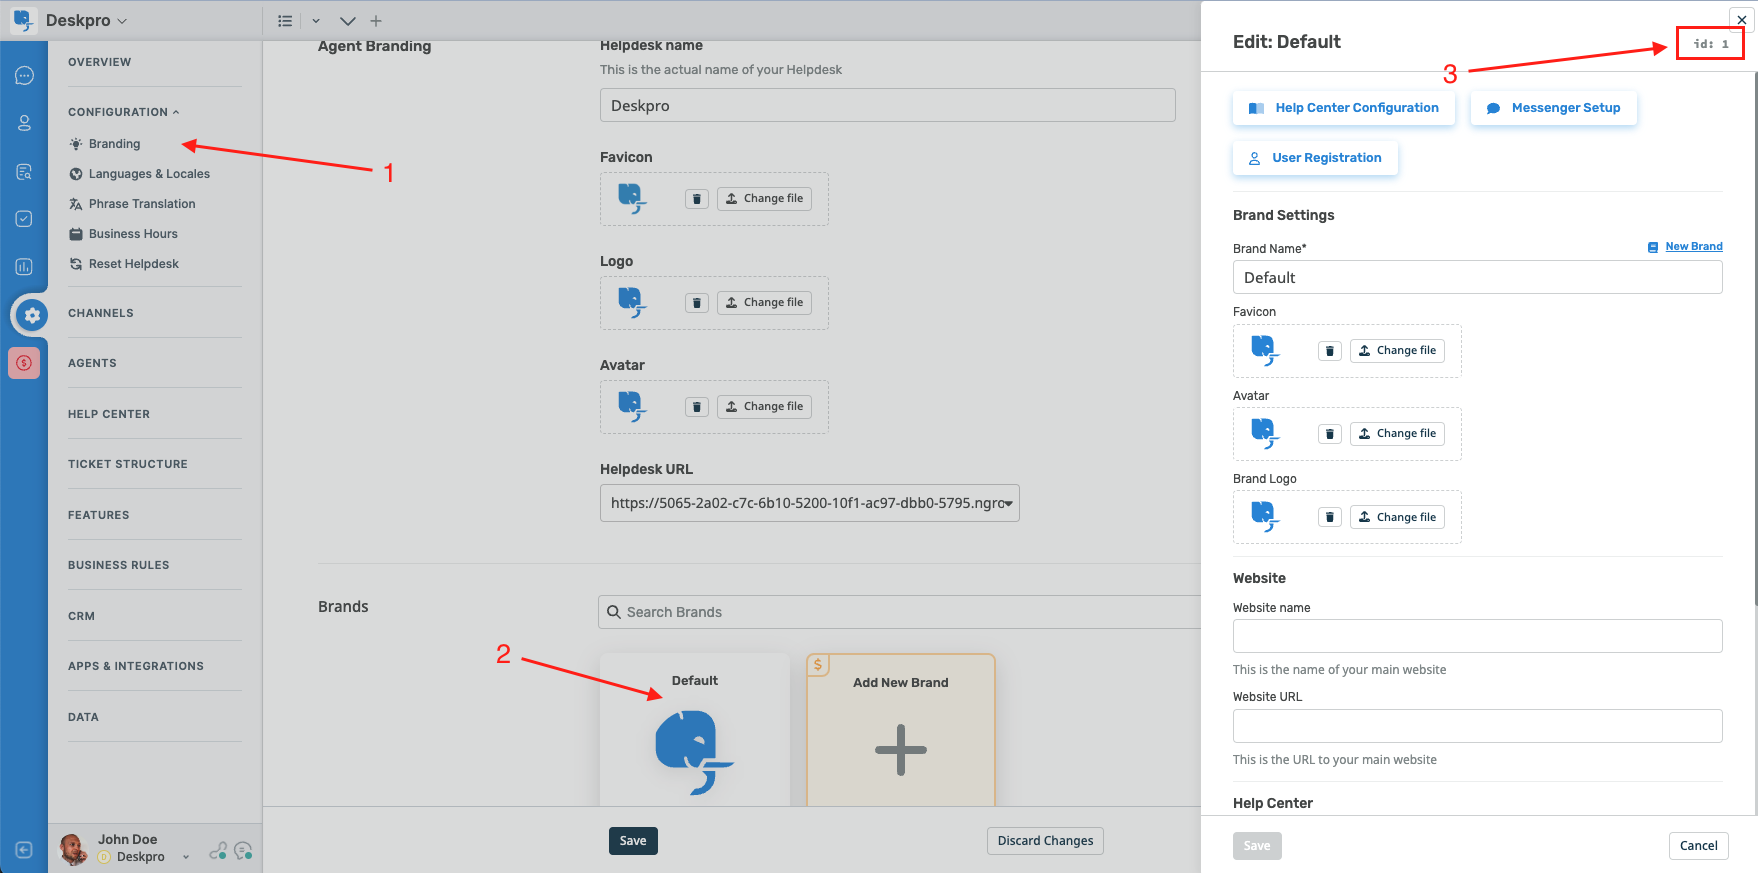
The first thing you'll need to do is find out your brand IDs to reference in your argument.
The easiest way to do this is by accessing Admin > Configuration > Branding
Click on the brand that you would like to reference, and you will be able to see the brand ID in the top right corner of the brand menu:

Example: Adding arguments to your Email Templates
To edit your email templates, go to Admin > Channels > Email > Email Templates. In this example I'm going to have two brands:
Deskpro (ID 1)
Elephant Inc (ID 2)
To distinguish between the brands, I would like my emails sent to include the brand name for the relevant brand after the agent's signature on each email.
In this instance, I can use a simple if statement in the Template after the footer to achieve this:
{% if ticket.brand.id == 1 %}
Deskpro
{% elseif ticket.brand.id == 2 %}
Elephant Inc
{% endif %}
For this example, I would insert the if statement into the template as follows:

Which will look something like this:

Further Reading
You can also adjust styling across brands as well as content - you can read this Knowledgebase Article for more information.
A particularly useful example of this can be using different logos in different emails.
Read the w3schools.com guide to using images with HTML below: https://www.w3schools.com/html/html_images.asp

