


You can edit your Help Center Templates to provide a different Welcome Message for different End-Users. e.g. create different versions for VIP Users or different messaging for your Internal Staff vs your End-Users.
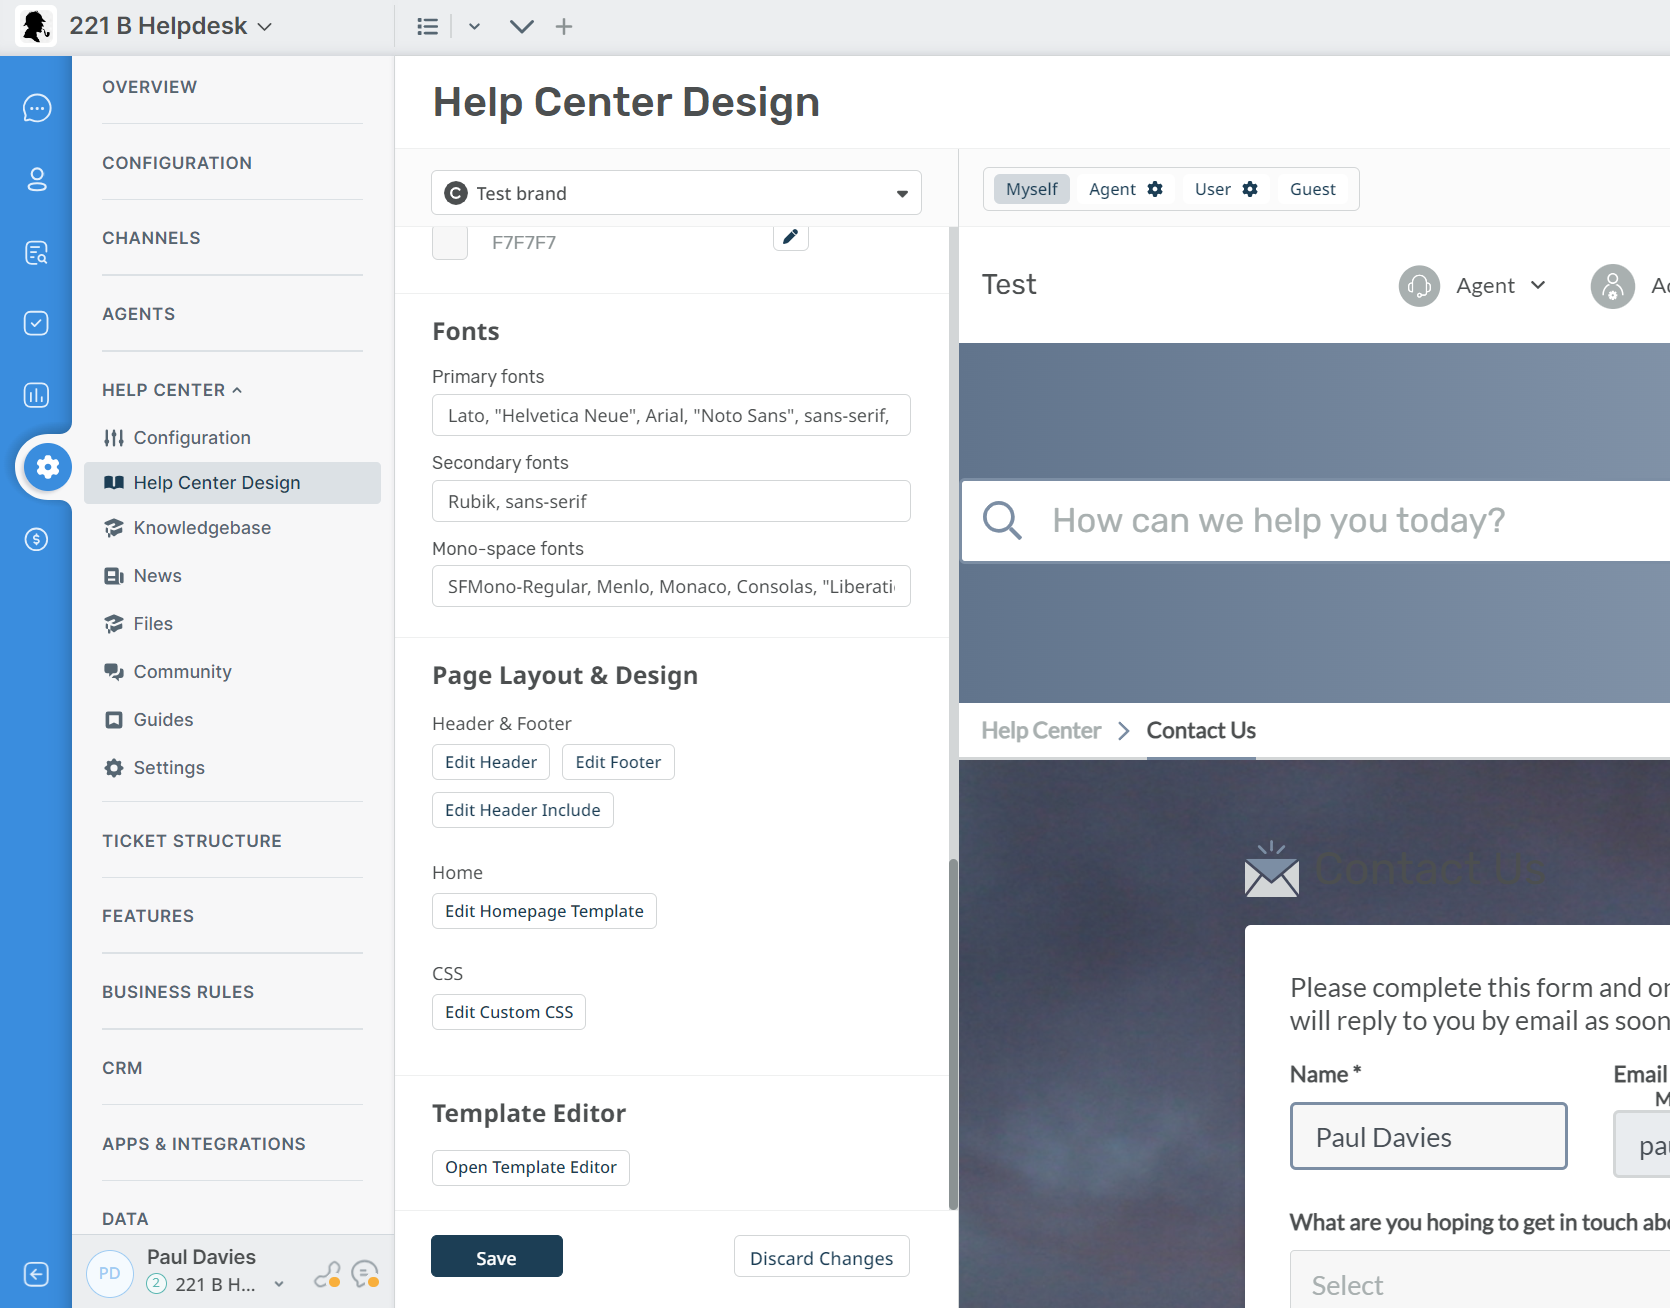
To do this go to Admin > Help Center > Help Center Design. Scroll down to Template Editor and click Open Template Editor. Select Portal from the dropdown and then welcome-box.html.
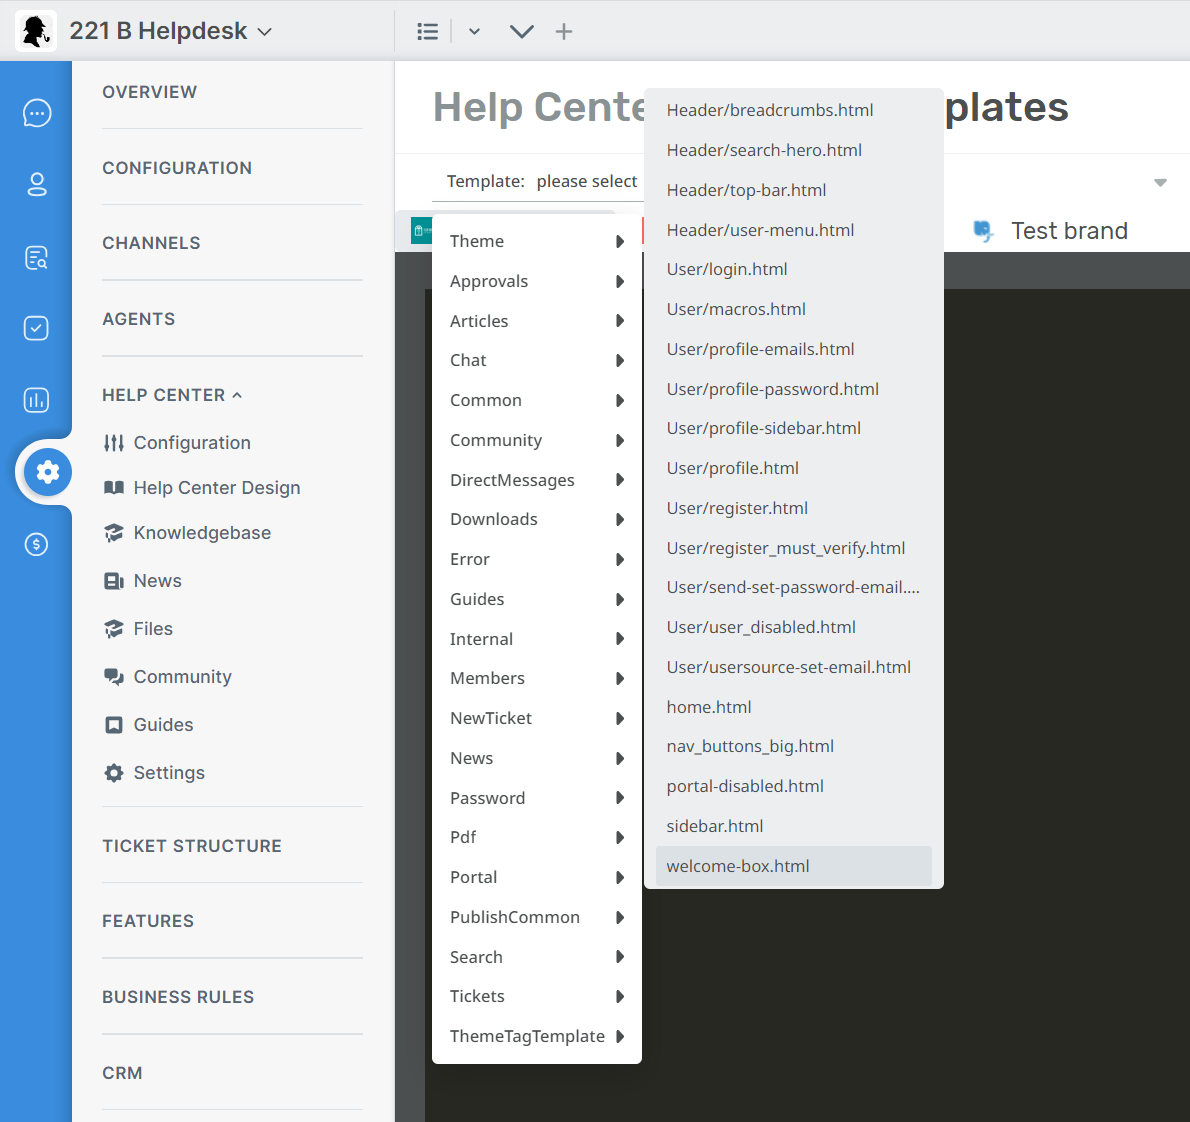
This is a full template where you can use all templating tags and logic. Here is an example that you can use to show different messages based on your usergroups.
<article class="dp-intro-box">
{% if app.user.isMemberOfUsergroup(3) %} Message for usergroup #3
{% elseif app.user.isMemberOfUsergroup(4) %} Message for usergroup #4
{% else %} Message for everyone else {% endif %}
</article>
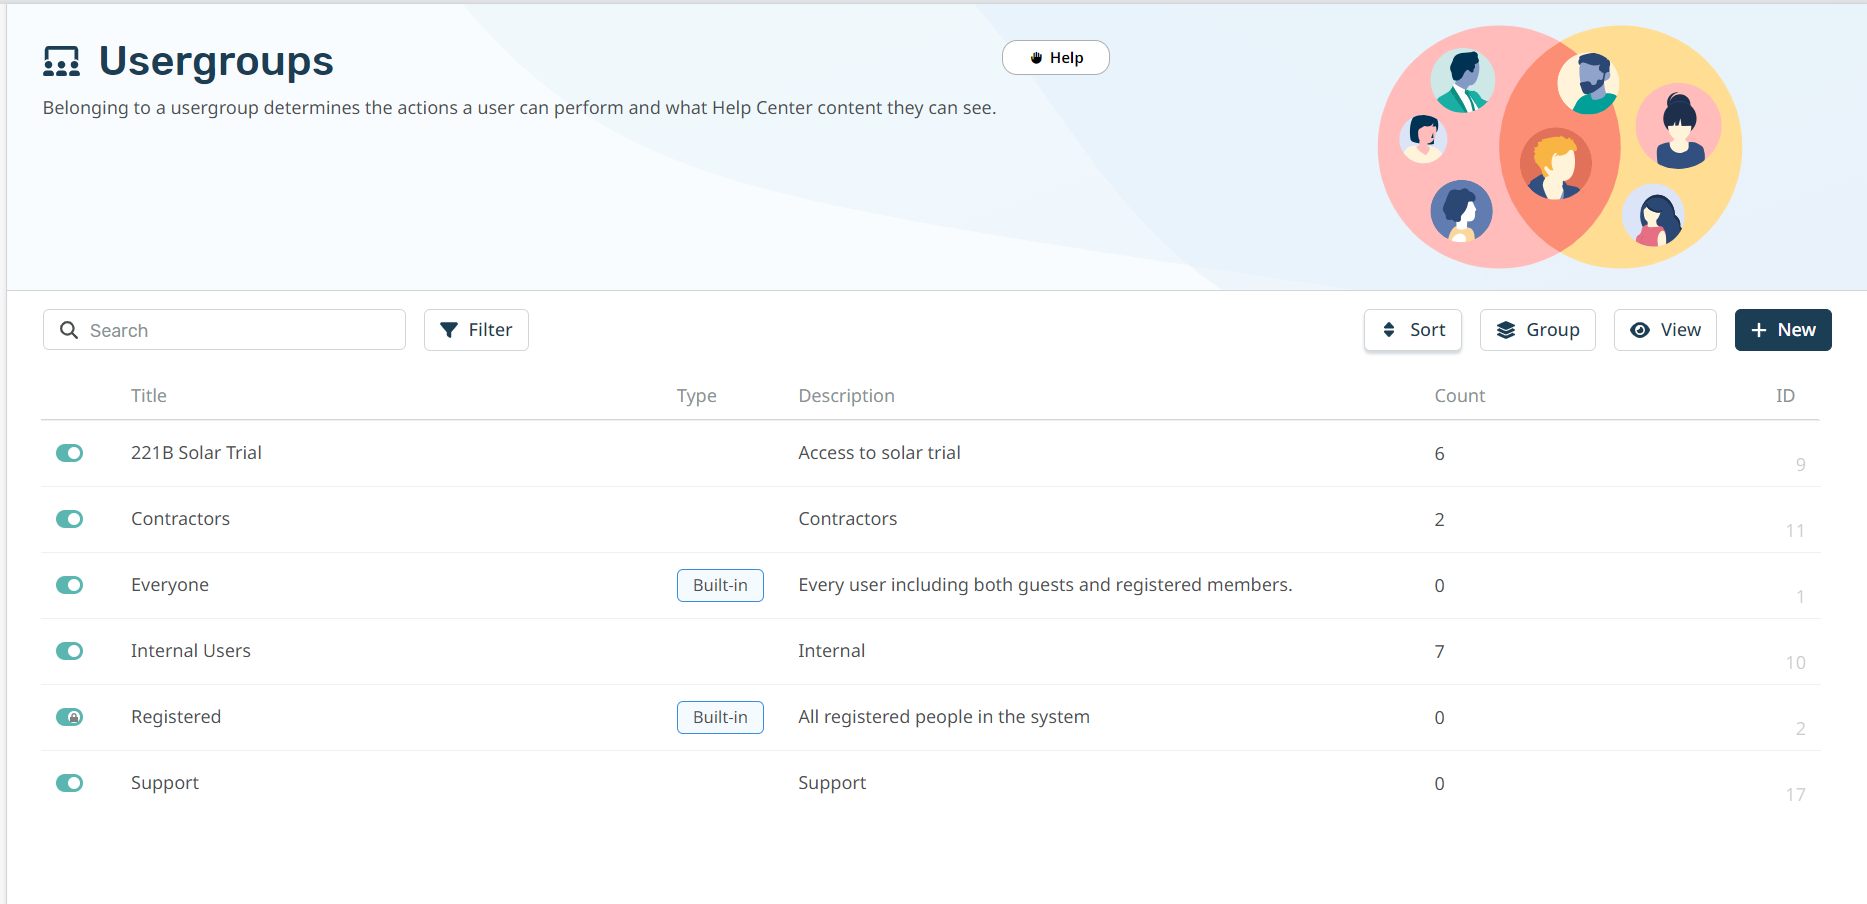
You can find the usergroup IDs from Admin > CRM > Usergroups. By default, the ID of the Usergroup is shown in the right-hand column.
For more information about how you can use Usergroups to segment information in the helpdesk and Help Center see Introduction to Usergroups.