


Deskpro, by nature, is a helpdesk software tool that is extremely flexible. Our designers and developers work hard to create a variety of views and adjustments so every Deskpro Agent can display their helpdesk in a way that is most useful for them and increases their productivity.
At its core, Deskpro is created to make your lives easier. You should be able to support your customers, staff, or end-users on a platform that makes sense for your use and can be entirely customized to make it your own.
We designed our interface to work on a range of screen sizes; from a small laptop to a 32” 5k monitor, you can have an optimized experience with Deskpro! We also support mobile ticketing on our Android and iOS native Deskpro apps.
We have recently been adding even more adjustment functions into Deskpro, and continue to work on more (you can keep up to date with all the improvements and features we release each week from our Release Announcements, and you can also subscribe to this News category, so you’re notified every time there’s a new upgrade).
The Deskpro Interface
As you’re becoming more familiar with the layout of Deskpro Horizon, we wanted to walk you through the different viewing options and make sure you’re aware of all the changeable components in the helpdesk.
You can also watch our video overview that summarizes some of the adjustable elements of your helpdesk, watch the video.
Just to refresh your memory, here are some of the key areas of the interface (these are the terms we will use throughout this article):

The Navigation Bar: Where you select the Deskpro app you need to work on;
Tickets: Where Agents communicate with Users via the ticketing system.
CRM: Where User, Organization, and Agent information is stored to provide a record of each individual and their history with your helpdesk.
Publish: Where you create and manage content for your Help Center platform.
Tasks: Where you can create, manage, and view any tasks that you are assigned.
Reports: Where you can view data and statistics relating to your helpdesk.
Admin: The area where Admins manage and configure helpdesk settings.
Navigation Panel: Used to filter the items you are dealing with in each of the Deskpro apps, e.g., Tickets, Users, and Stats.
View Panel: The view panel displays the result of your selection in the navigation panel. For example, if you click on the Ticket Queue ‘My Tickets’, you will see a list of tickets that match this in the view panel. There are two different views that you can display tickets:
Dual View
Table View
Kanban View
Content Panel: This is the area where you will work with and create individual items in the helpdesk.
User and Organization Profile: This is where the User or Organization information will open relating to the ticket you are working on at the time.
Helpdesk Apps: You also have the helpdesk apps, News App, Agent IM, Notifications, and Global Search. These apps help you to work with your team and find information quickly and can be opened on the interface if needed.
Collapsing and Expanding Panels
One of the first viewpoint changes we’re going to walk through is collapsing and expanding different elements of the interface. We have made several different panels in the interface collapsible so you can adjust your helpdesk’s display.
Some Deskpro Agents like being able to collapse panels because they (1) might work on a smaller screen and it instantly increases visibility, or (2) they simply prefer having a more focused work area in the helpdesk, e.g. having an open ticket displayed as the main view on the screen.
The Navigation Panel
One of the primary panels that are collapsible is the Navigation Panel. You collapse this panel by clicking on the chevron in the bottom left-hand corner of the interface.

Dual View
If you are using the helpdesk in Dual View, you can still view the queue items you selected in the view panel on the left-hand side of the interface. You can easily navigate between tickets from here by choosing different tickets from the list.


Table View
Or if you’re viewing the helpdesk with the Navigation Panel closed in Table View, you can still access the items you need from the Navigation Panel as they are rolled up into the Return to List button.


The User and Organization Panel
Another Panel that you can collapse is the User and Organization profile. When expanded, the User and Organization Profile displays on the right-hand side of an open ticket. It provides context about the User on a ticket and the Organization they are a member of.
By clicking on the User’s name in the Ticket Properties Panel on an open ticket, you can toggle this panel on or off, giving you a clearer view of a ticket when hidden or more context about the ticket when in view.

The interface will remember your preferences, whether you last had the panel hidden or in view when you next open a ticket. If you prefer keeping this panel closed, you can open it at the click of a button, and the information will load instantly.

Viewing Modes
You also have options for how you display the ticketing interface. Currently, we have Dual, Table, and Kanban Views.
Dual View
Dual View shows the list of tickets from the queue you have selected as condensed cards in the View Panel. When you open a ticket, the cards still appear to the left of the open ticket, so you can quickly select different tickets.


Table View
Alternatively, you can view the helpdesk in Table View. Table View presents the tickets in an adjustable table where all the tickets are listed across the width of the interface. Clicking on a ticket in this view will open it in front of the ticket list.


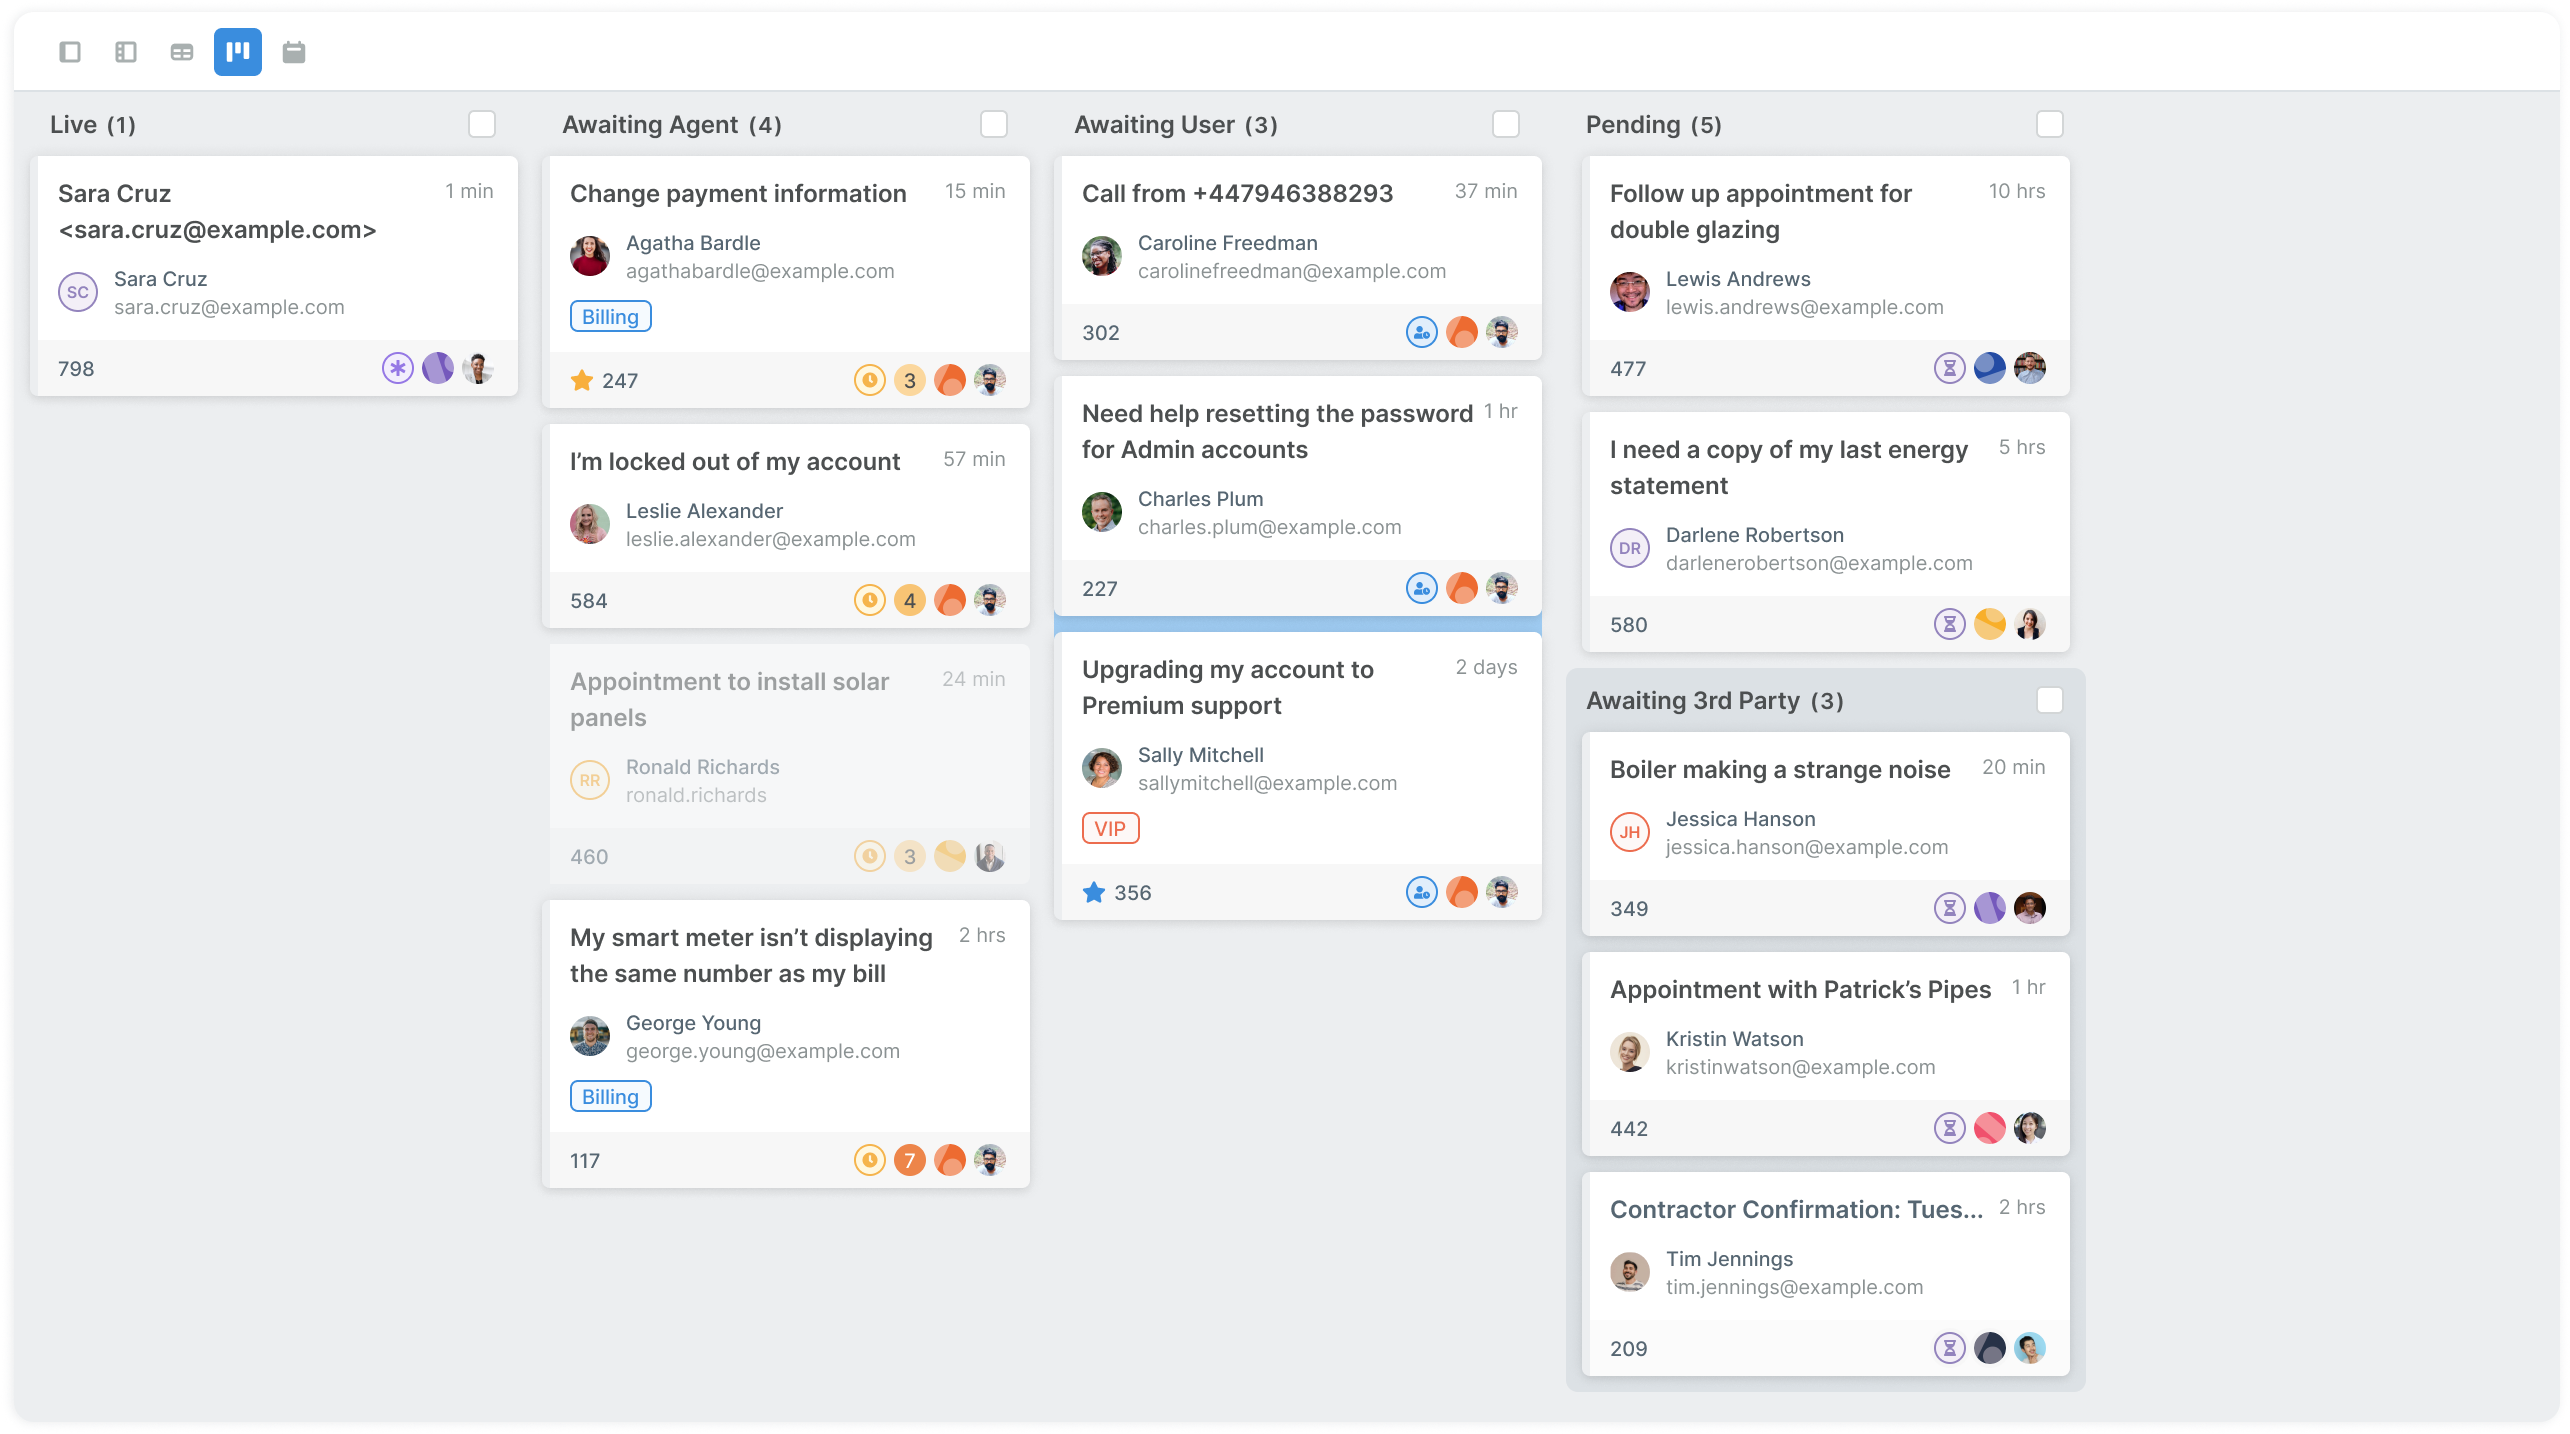
Kanban View
Kanban View provides a clear visual project view in the helpdesk. Kanban is an agile work management tool that helps you group tickets in a visual workflow that aids the work process and boosts efficiency.
Deskpro’s Kanban view lets you organize tickets in a dynamic project management tool. You can create clear, structured workflows and move tickets along with simple drag-and-drop functionality.
Adjusting the Ticket Message Size
You can now change the size of the ticket message by adjusting the width of the Ticket Properties Panel and the User Profile. We have added the ability to resize these columns to give you choices over your workspace.
In the Tickets app, when you select either the Properties Panel or User Profile columns you can adjust them to give you the desired working space on a ticket.

The Header Bar
The Header bar provides two useful ways to navigate through tabs and view items you have recently had open.
You can quickly navigate between your open items by clicking on the tabs, no matter what type of content you have open.


You can also use the Search Bar in this menu to find specific open or historical items:

Deskpro Apps
Another way you can adjust your viewing preferences over the Deskpro UI is with our apps. You access the different apps, Agent IM, Notifications, and Search from the top right-hand corner of the interface.


