


Follow the below steps to set up Deskpro to read your G Suite/Gmail account through Google OAuth when on-premise.
Note: You can also connect via Google OAuth on the cloud platform. The Google API keys have already been configured on the cloud platform, so you only need to enter your email address and password into the connection settings (essentially skipping straight to step 6) to achieve this. You may need to generate an App Password or Enable Less secure apps as outlined here.
1. Create a new project
Log in to your Google API Console account. Make sure you log in with your G Suite administrator account or you may have trouble.
https://console.developers.google.com/
Once logged in, click on Select a Project - this will open up a window with any existing projects you have. For the purposes of this tutorial, we advise you create a New Project here.
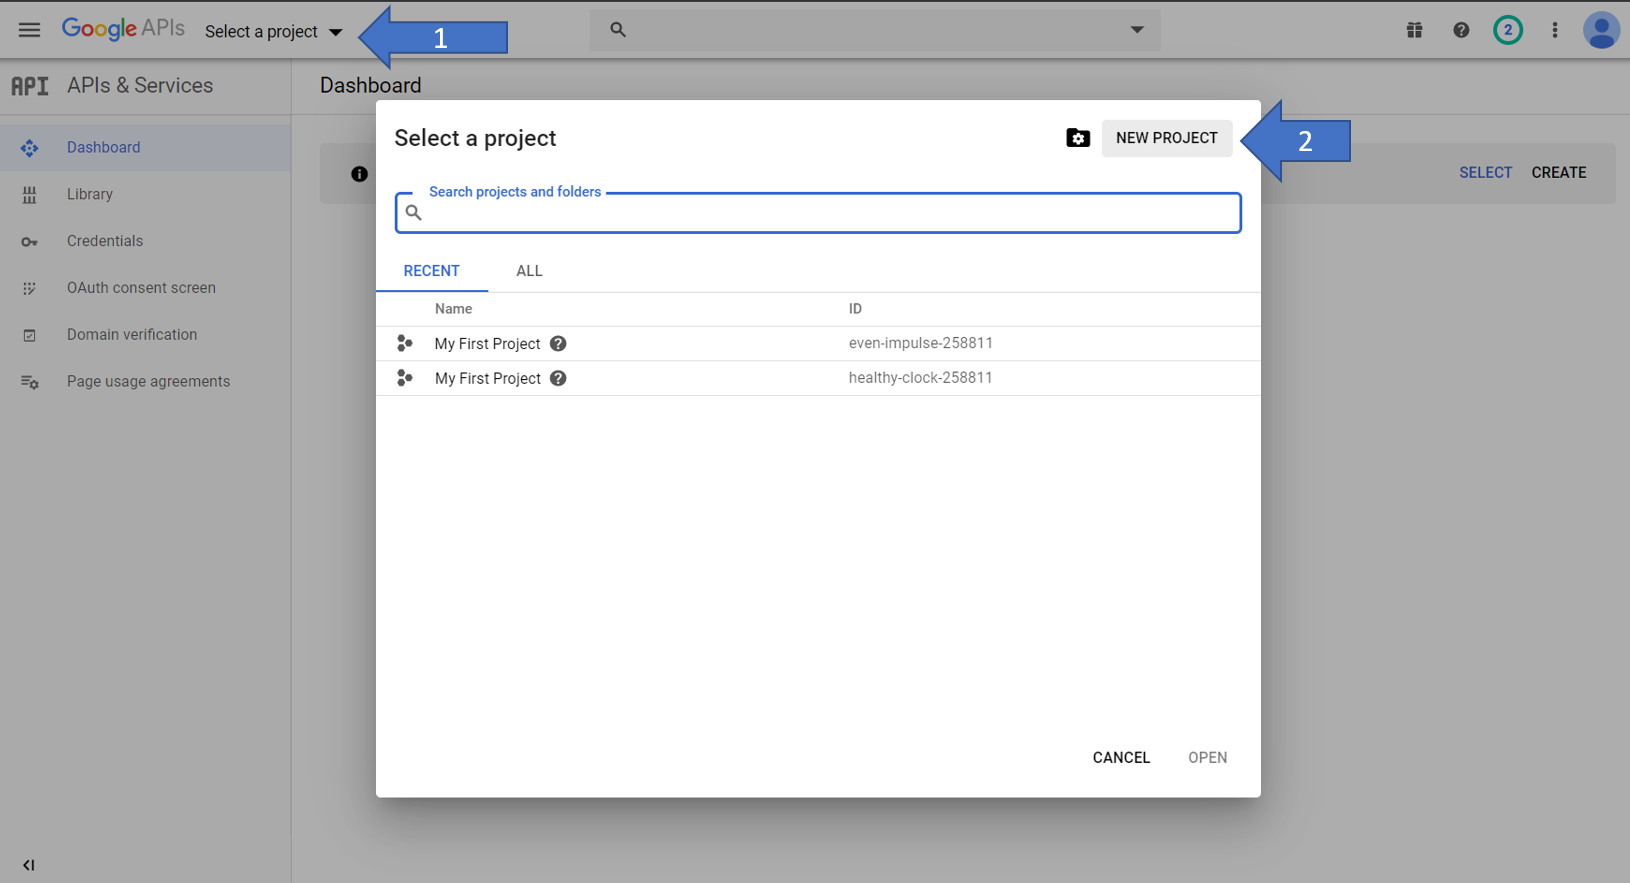
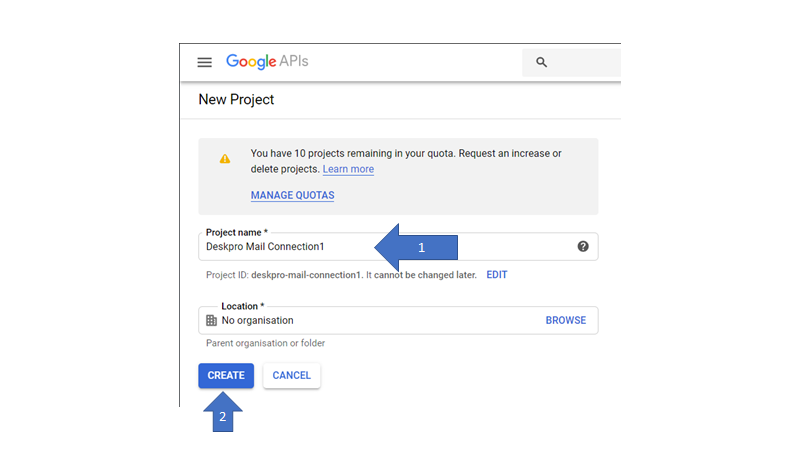
In the next step, define a project name. This is just a placeholder, so you are free to define anything. Your organisation/location can also be left as default unless you require something specific. Press Create
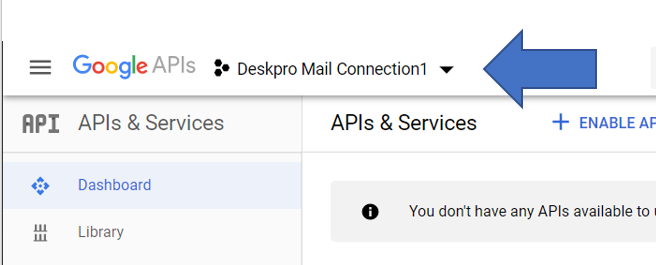
This may be selected by default, if not, select your project from the drop down list. Ensure you are working inside this project for the next step.
2. Enabling the Gmail API
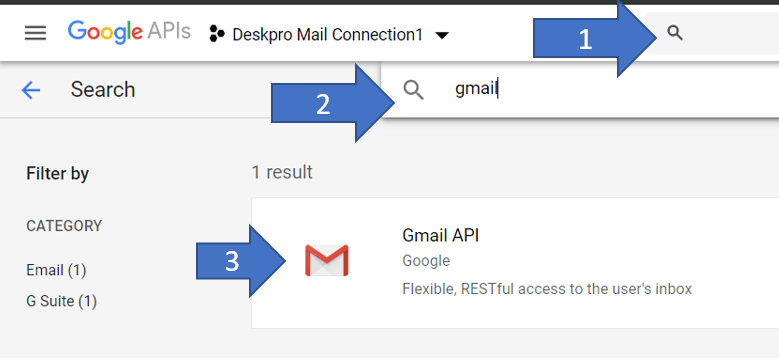
Next, search specifically for "gmail" in the search bar at the top of the page. There should be only a single result, click on "Gmail API"
Once the Gmail API configuration is open, you will want to Enable this API.

You may find this action takes a few minutes to complete. Please wait until the API shows as enabled.
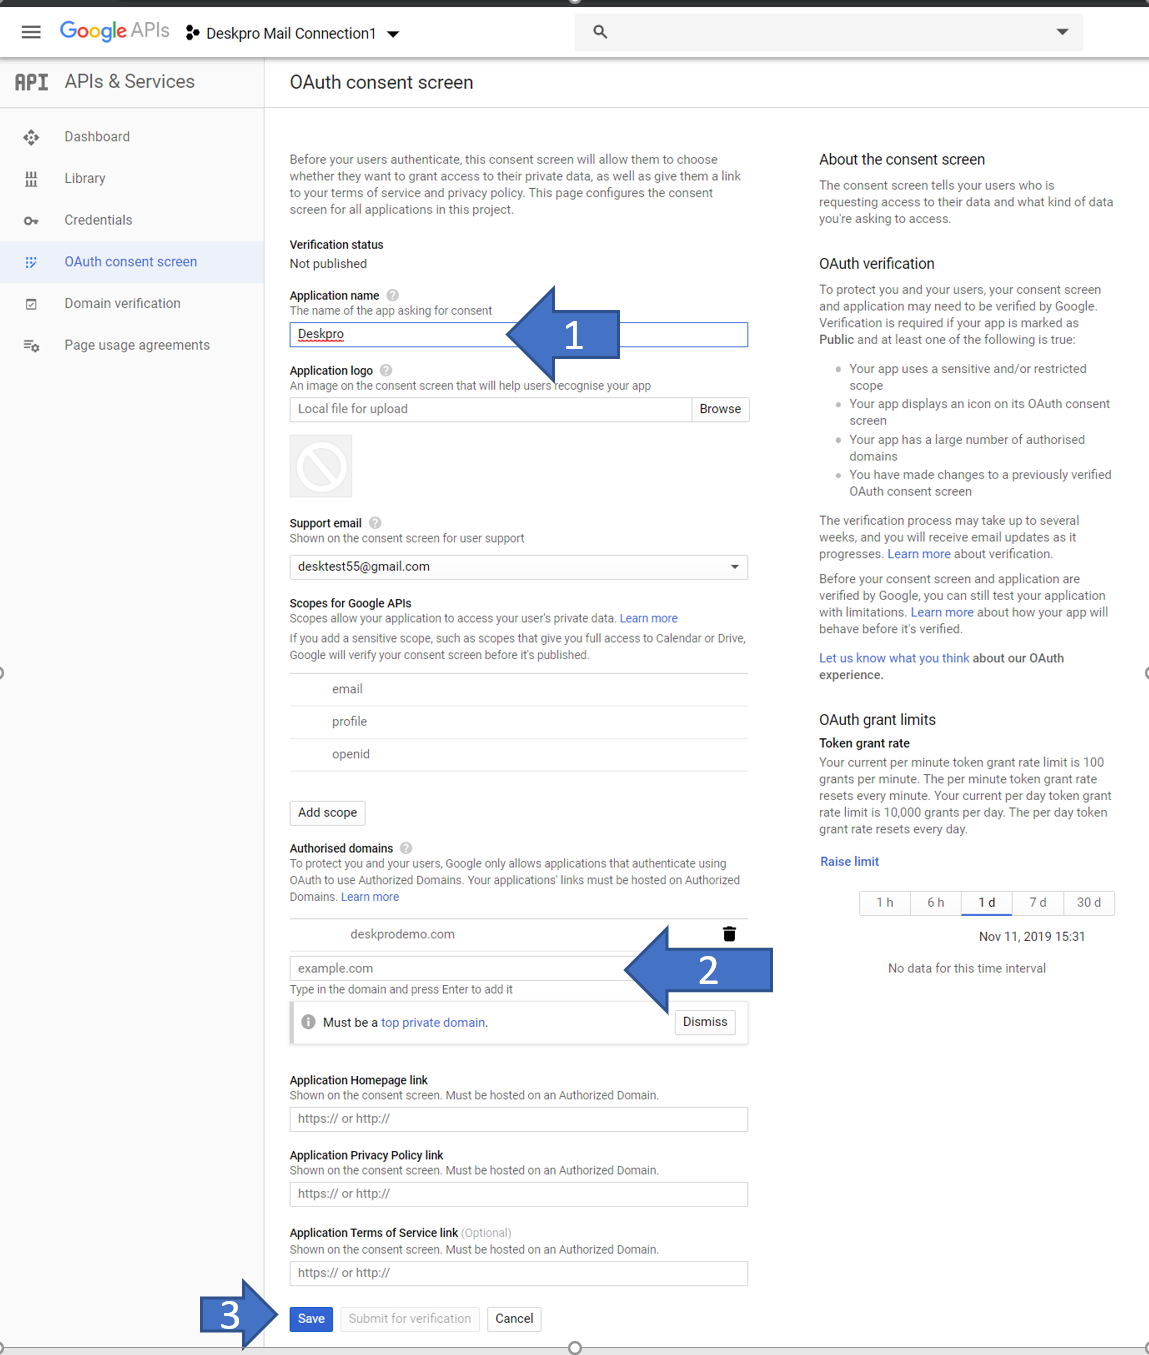
3. Creating OAuth Consent Screen
Once inside the management screen, you will need to configure a consent screen. Press Credentials, then Configure Consent Screen
This is quite a basic config. You must specify an "Application Name" - which can be anything at all, we have gone with something generic here.
You are also encouraged to specify an authorised domain. This will just be the domain of your helpdesk, for example helpdesk.example.com - this step is not 100% necessary and can be revisited.
Ensure you save this consent screen.
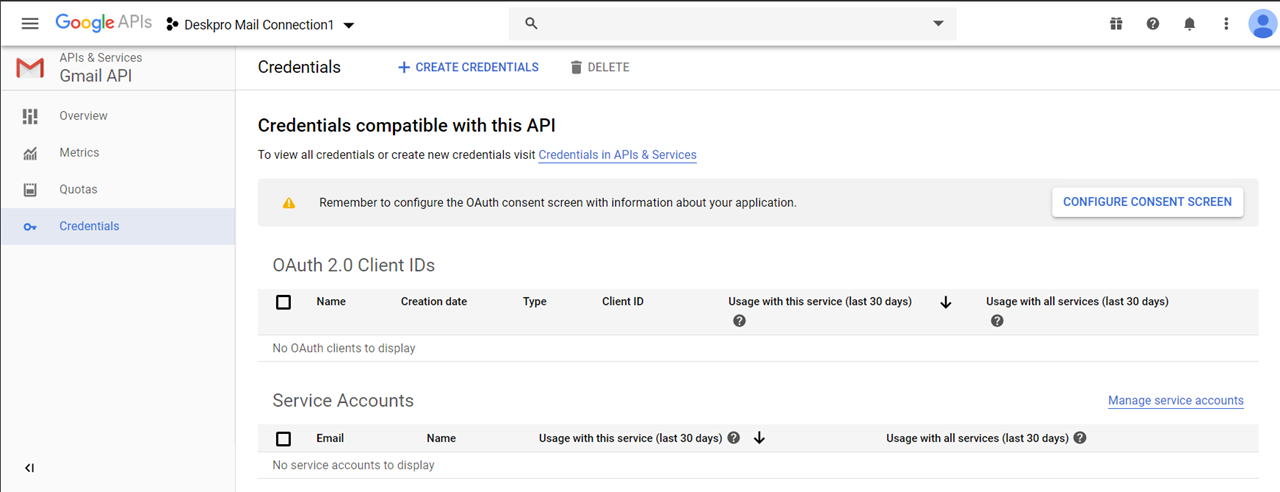
4. Creating OAuth Credentials
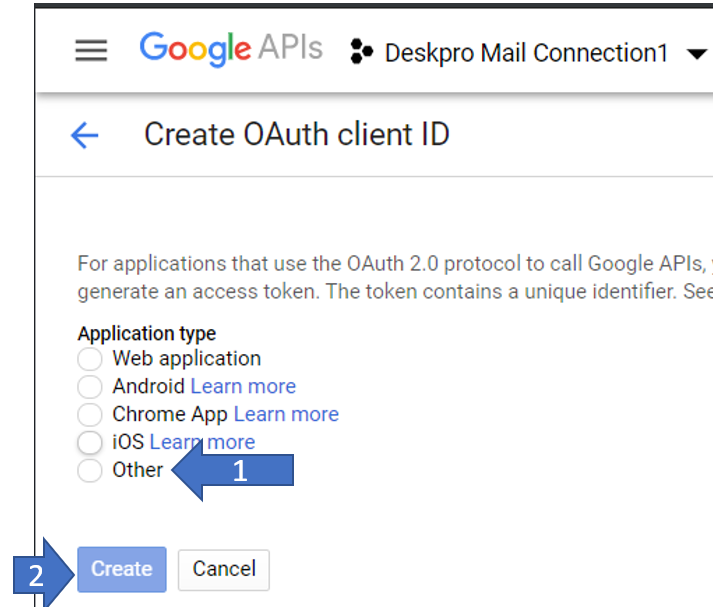
After the consent screen is configured, you can now create a set of credentials. Ensure you are in the "Credentials" menu, "Create Credentials" and select "OAuth Client ID".
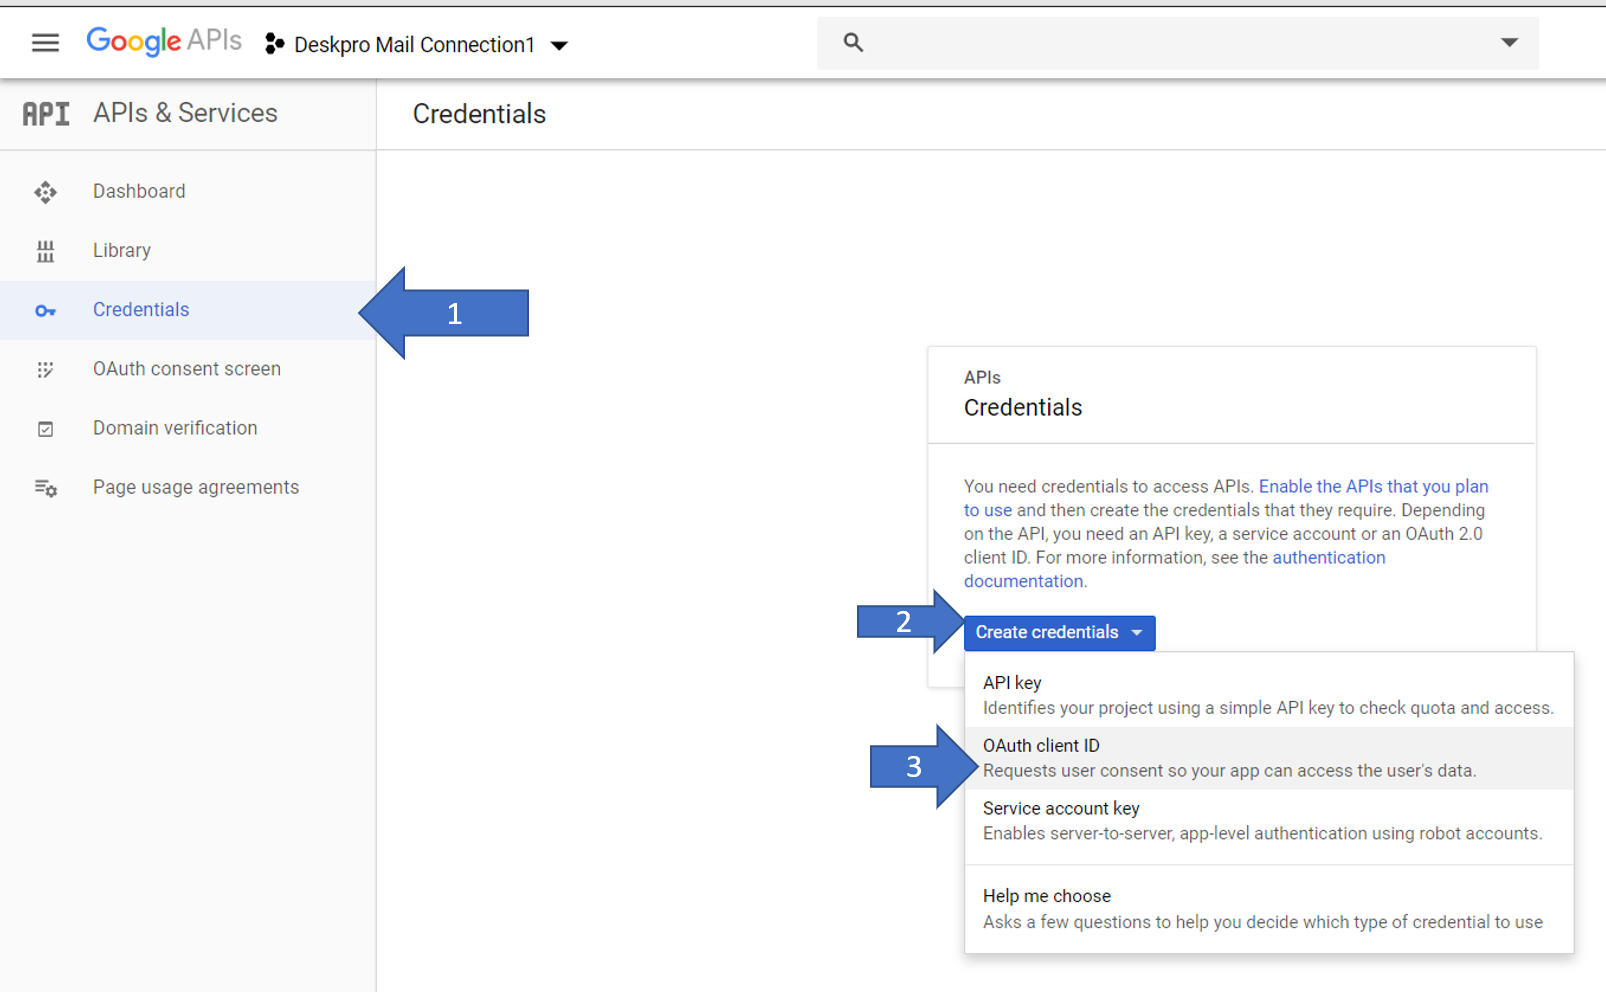
You will need to select "Other" as the application type, and press create.
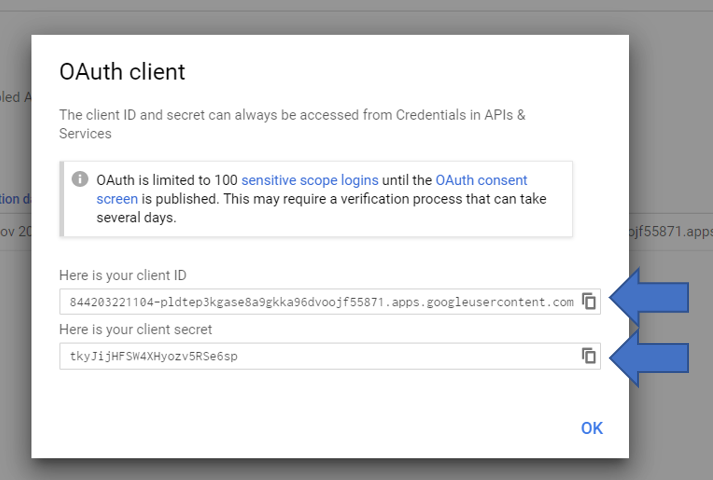
Once complete, you should be issued with a "Client ID" and "Client Secret". Please record these for the next step, they can be retrieved and reset at any time.
5. Connecting Deskpro with OAuth
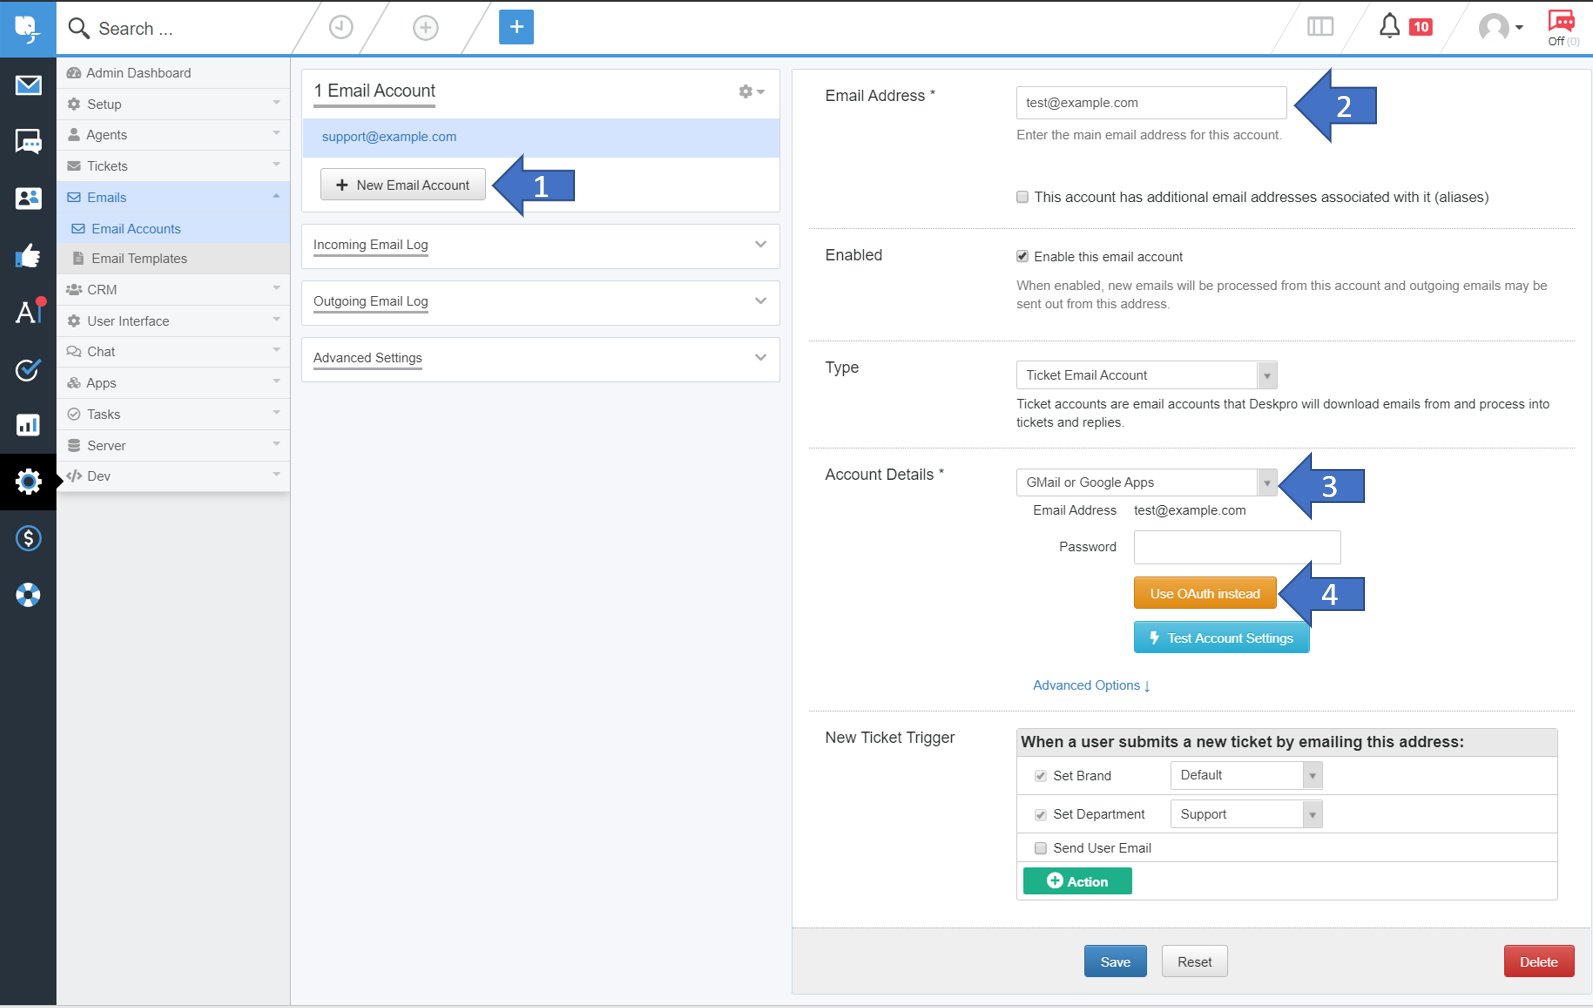
Create a new Email Account while logged in as a help desk administrator. Navigate to Admin > Emails > Email Accounts > New Email Accounts.
- Specify the new address you want to connect to.
- Select "Gmail or Google Apps"
- Select "Use OAuth Instead"
Click on the "Get Access Code" button, which should open up a pop-up asking for the previous credentials.
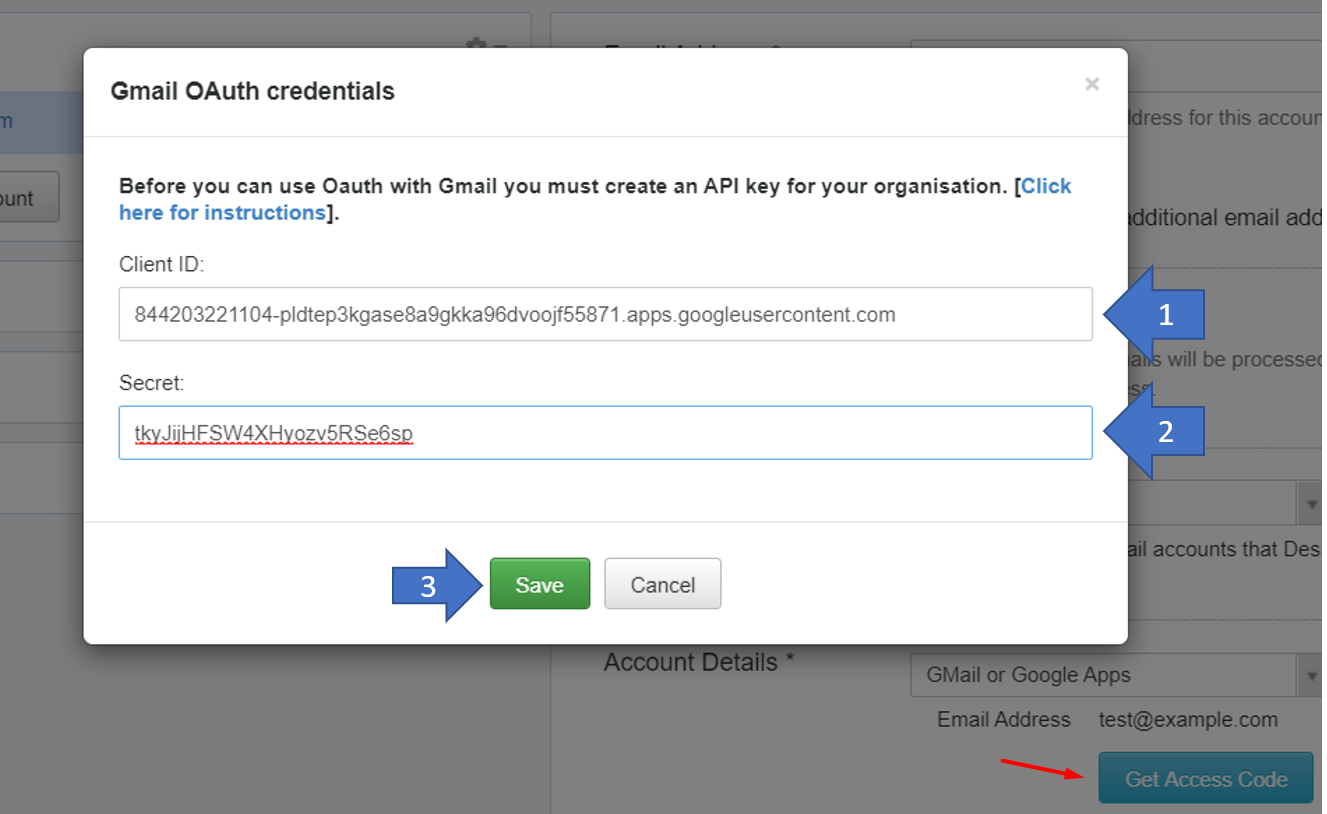
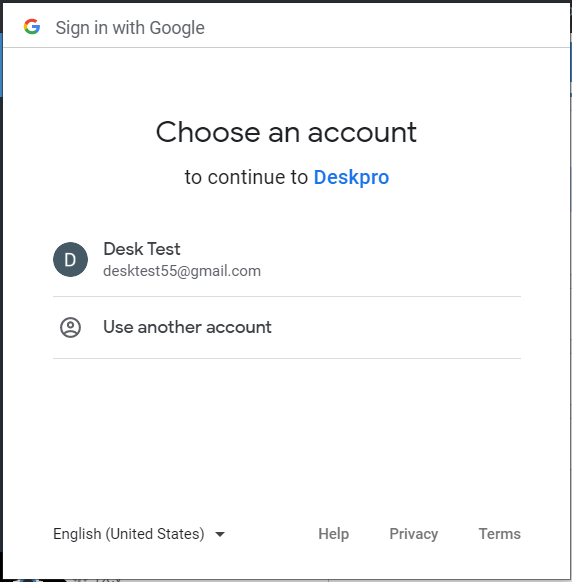
Specify the Client ID and Secret exactly as it was given to you in the previous step and Save the config. You will be taken through a standard authorisation process. Select the Email address you are using:
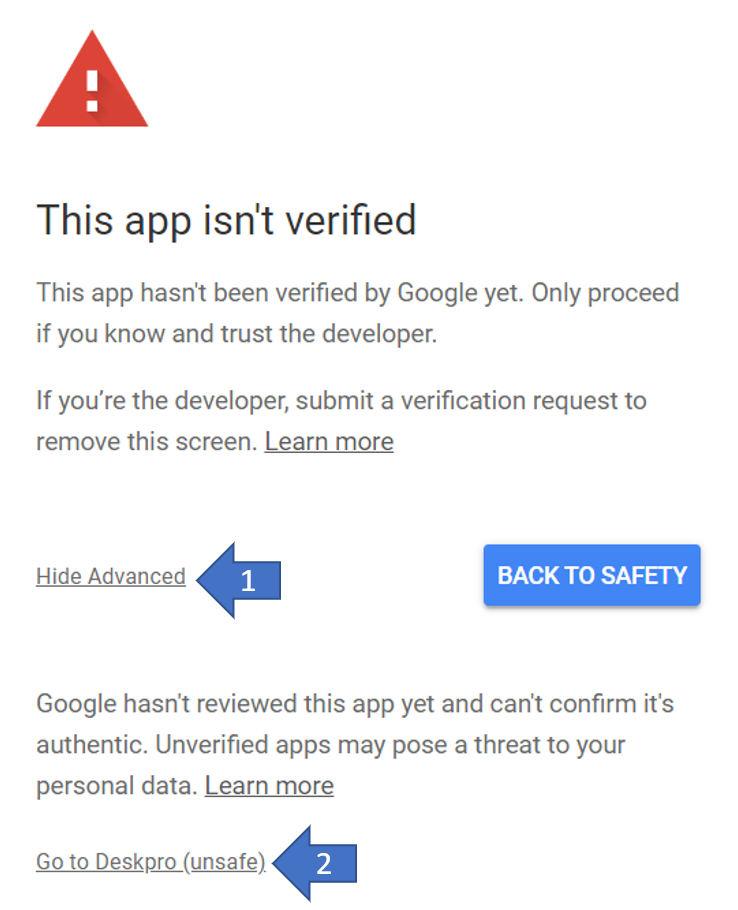
If you are prompted and asked "This app isn't verified", you are able to safely accept this warning - as you are the person configuring the app. Press "Advanced" and "Go to Deskpro"
6. Authorising Deskpro to connect into your Email
You will need to way through the standard authorisation process. You may be familiar with this when linking your Gmail/Gsuite account with other application.
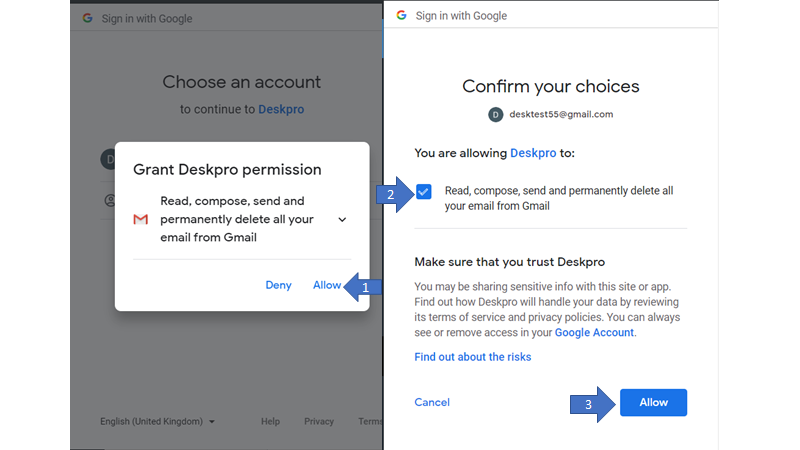
You will just need to press Allow and ensure Deskpro is allowed to relay email through this account. When this is complete you should finally be presented with an "Access Code". Ensure you copy this and keep it safe.

Paste this access code back into Deskpro and press "Get Access Token"

If you have completed these steps correctly, the interface should accept the key and give you the option to "Test Settings".
Ensure you save all of these settings as they appear above.
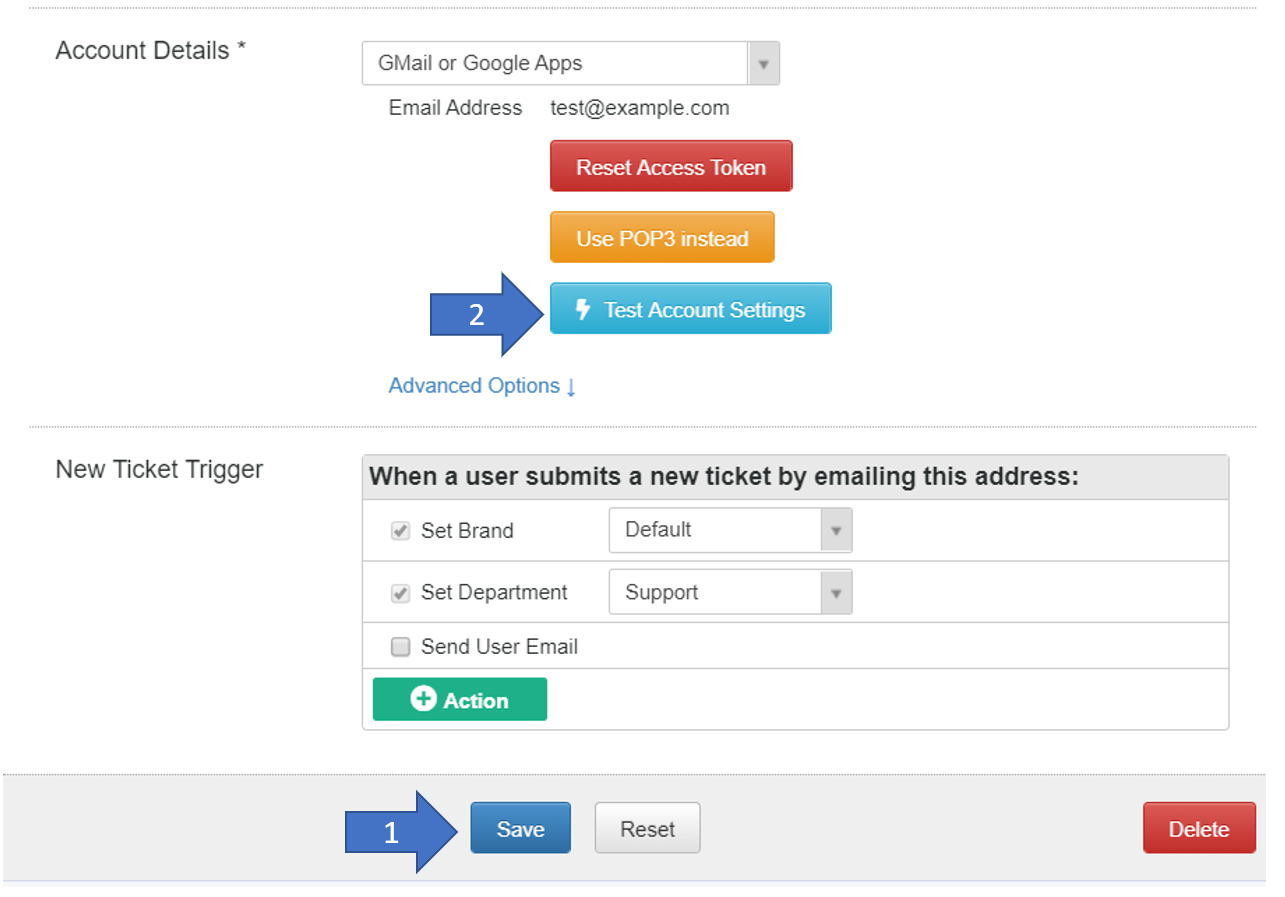
Feel free to use the "Test Settings" function - you should receive a positive message confirming the connection is correct.
7. Finishing Up
Ensure any of the keys/passwords which you saw through this page are now cleared and removed from your system. You do not want to store or share these keys.
Check your email by creating a basic test ticket, and sending a test email into the newly created account.
The account should start to read unread emails almost immediately now. The connector is set up to detect unread emails, import these, and mark them as unread.