


You can post ticket updates directly to Microsoft Teams from Deskpro.
To do this you simply need to setup an incoming webhook in Teams and a trigger in Deskpro.
Creating an Incoming Webhook in Teams
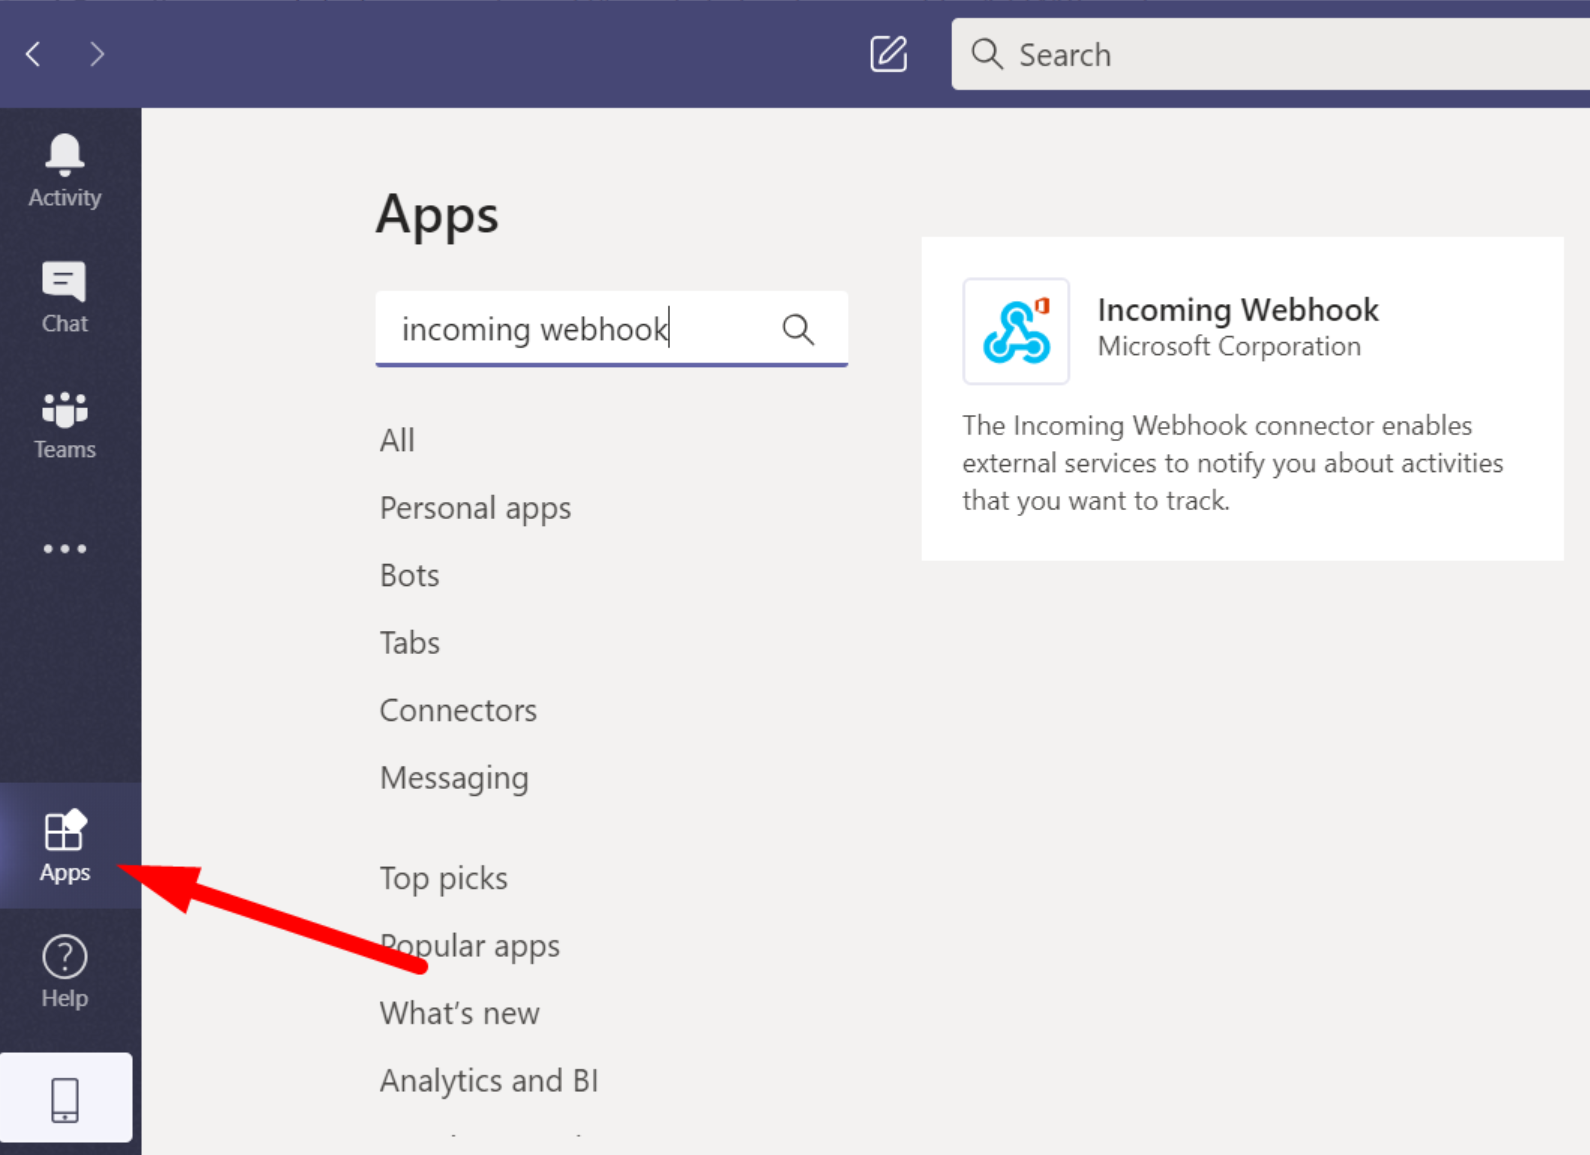
To create an incoming webhook in Teams navigate to apps in the bottom left of the UI then search for Incoming Webhook.
Select Incoming webhook -> Add to team and then select your team and the channel you wish to post to and hit Set up connector.
On the setup page you will need to create a name for your webhook and you also have the option to select an image that will appear next to posts made by the webhook into teams.
Hit create and the webhook will be generated:

Copy the URL created and hit done.
Creating the trigger in Deskpro
In this example we're going to create a trigger that posts a message to our Teams channel when a new ticket is created.
Go to Deskpro and then Admin > Tickets > New ticket Triggers and hit Add.
With this example, we want to post with all tickets so we'll leave all events checked and won't specify any criteria.
For our action we'll select 'Call Web Hook’:
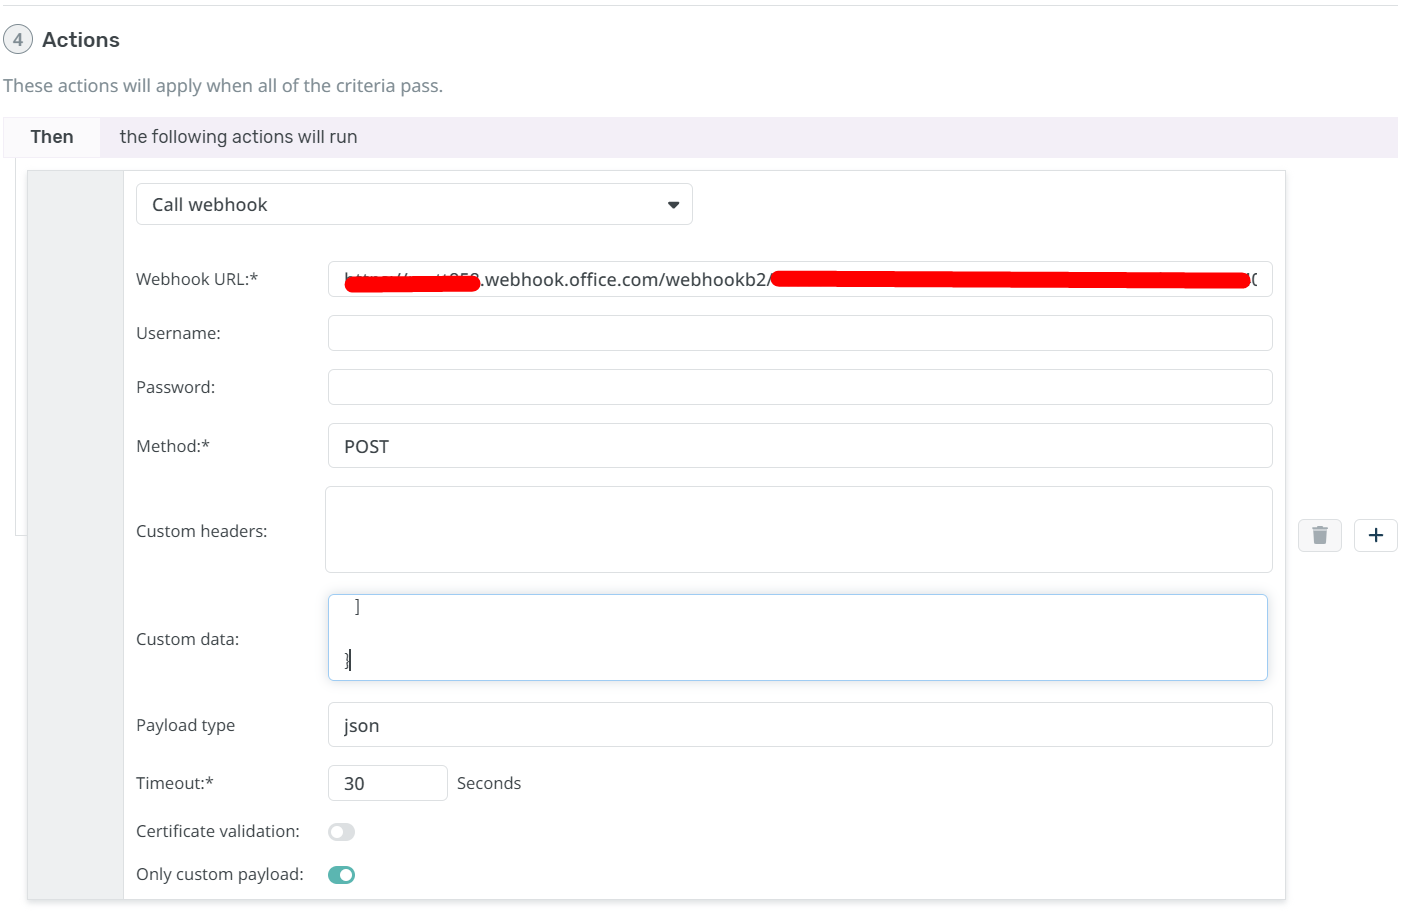

We then need to configure our action.
We'll need to define the following fields:
Webhook URL: Set this to the webhook you created in Teams
Method: Set this to POST
Custom data: We'll come to this in a moment
Payload type: json
Timeout: I've set this to 30 seconds
Certificate Validation: Ensure this is disabled
Only custom payload
Defining the Custom data field
You can read in detail about the format data needs to be sent in the Microsoft documentation
In my example though I'm just going to create a simple post with the user name, ticket id, ticket subject and a link to the ticket.
The code required for this is as below (be sure to update the URL in the potential action target from example.deskpro.com to your helpdesk URL):
{

   "@type": "MessageCard",
  "@context": "http://schema.org/extensions",
   "summary": "Deskpro ticket",
  "themeColor": "0078D7",
   "title": "New Deskpro ticket",
  "sections": [

     {

      "activityTitle": "User name",
       "activitySubtitle": "{{ ticket.person.display_name}}",
      "facts": [

         {

          "name": "Ticket ID",
           "value": " {{ ticket.id }}"

        },

         {

          "name": "Subject",
           "value": " {{ticket.subject }}"

        }

       ],

      "message": "Message content"

     }

  ],

   "potentialAction": [

    {
       "@type": "OpenUri",
      "name": "View in Deskpro",
       "targets": [
        { "os": "default", "uri": "https://example.deskpro.com/app#/t/ticket/{{ ticket.id }}" }

       ]

    }

   ]

}
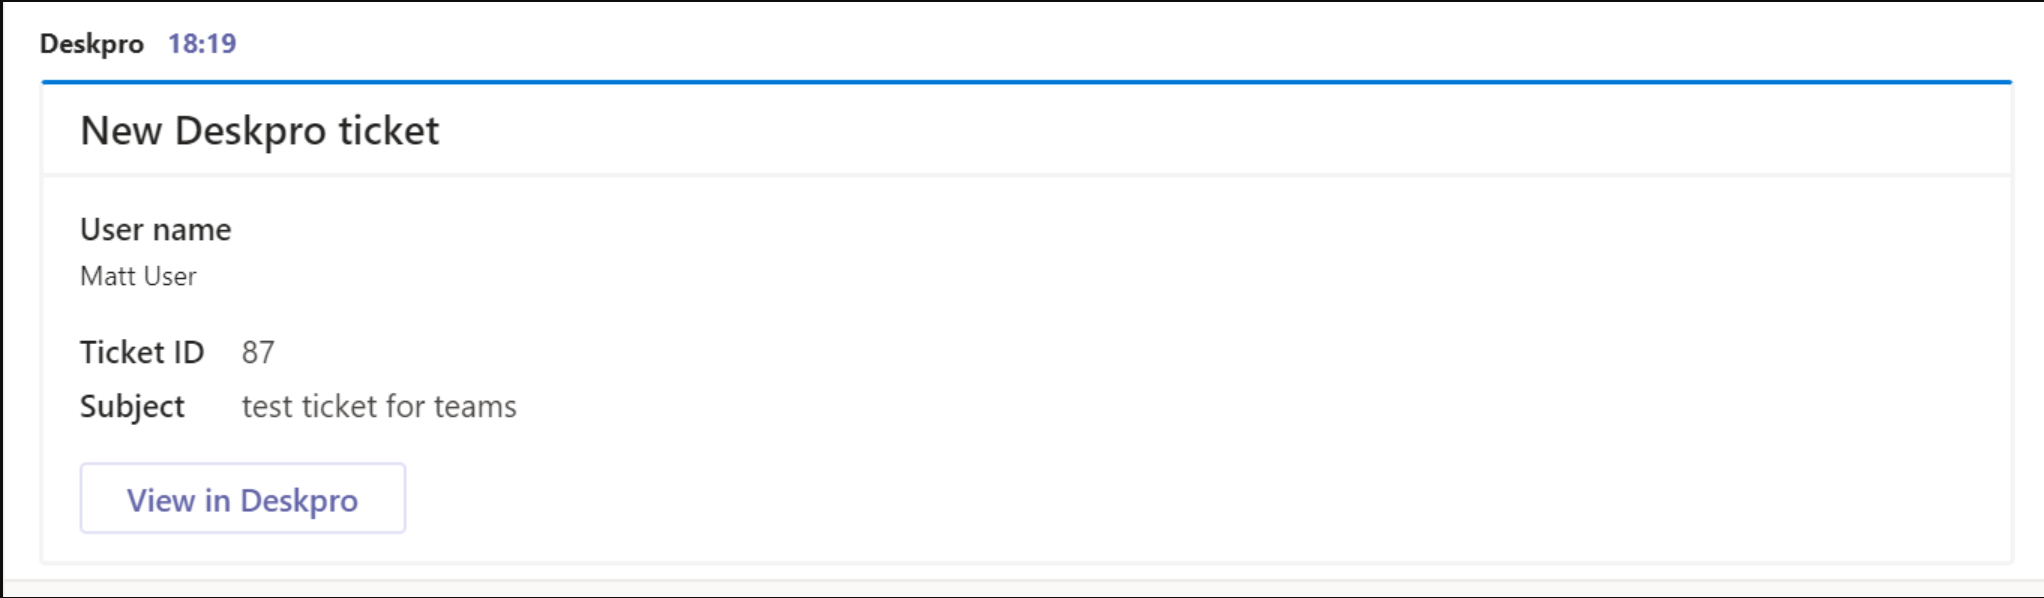
Here you can see we've used variables for username, ticket ID, and subject and will post the below in teams (including a button that links to the ticket):
You can read about other potential variables you could use in the Deskpro guides.
And you can refer to the Microsoft documentation on how to structure your JSON payload in different ways.