Service-level agreements (SLAs)
SLAs are a way to define expected ticket response or resolution times. This helps ensure that you and your agents are meeting the level of service you define or that your customers have contracted.
Define your SLAs
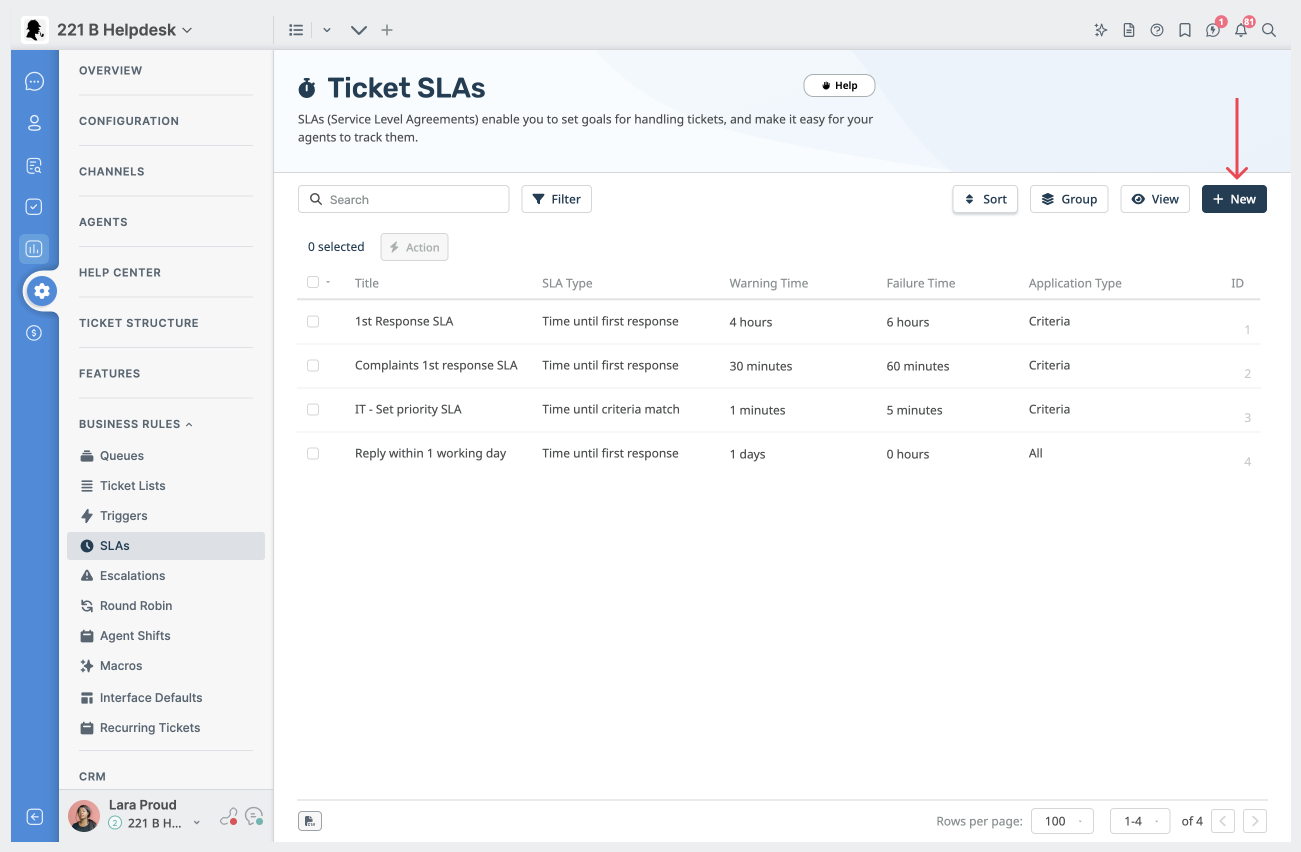
You can create and manage your SLAs at Admin Interface > Business Rules > SLAs. To create a new SLA, click + New.
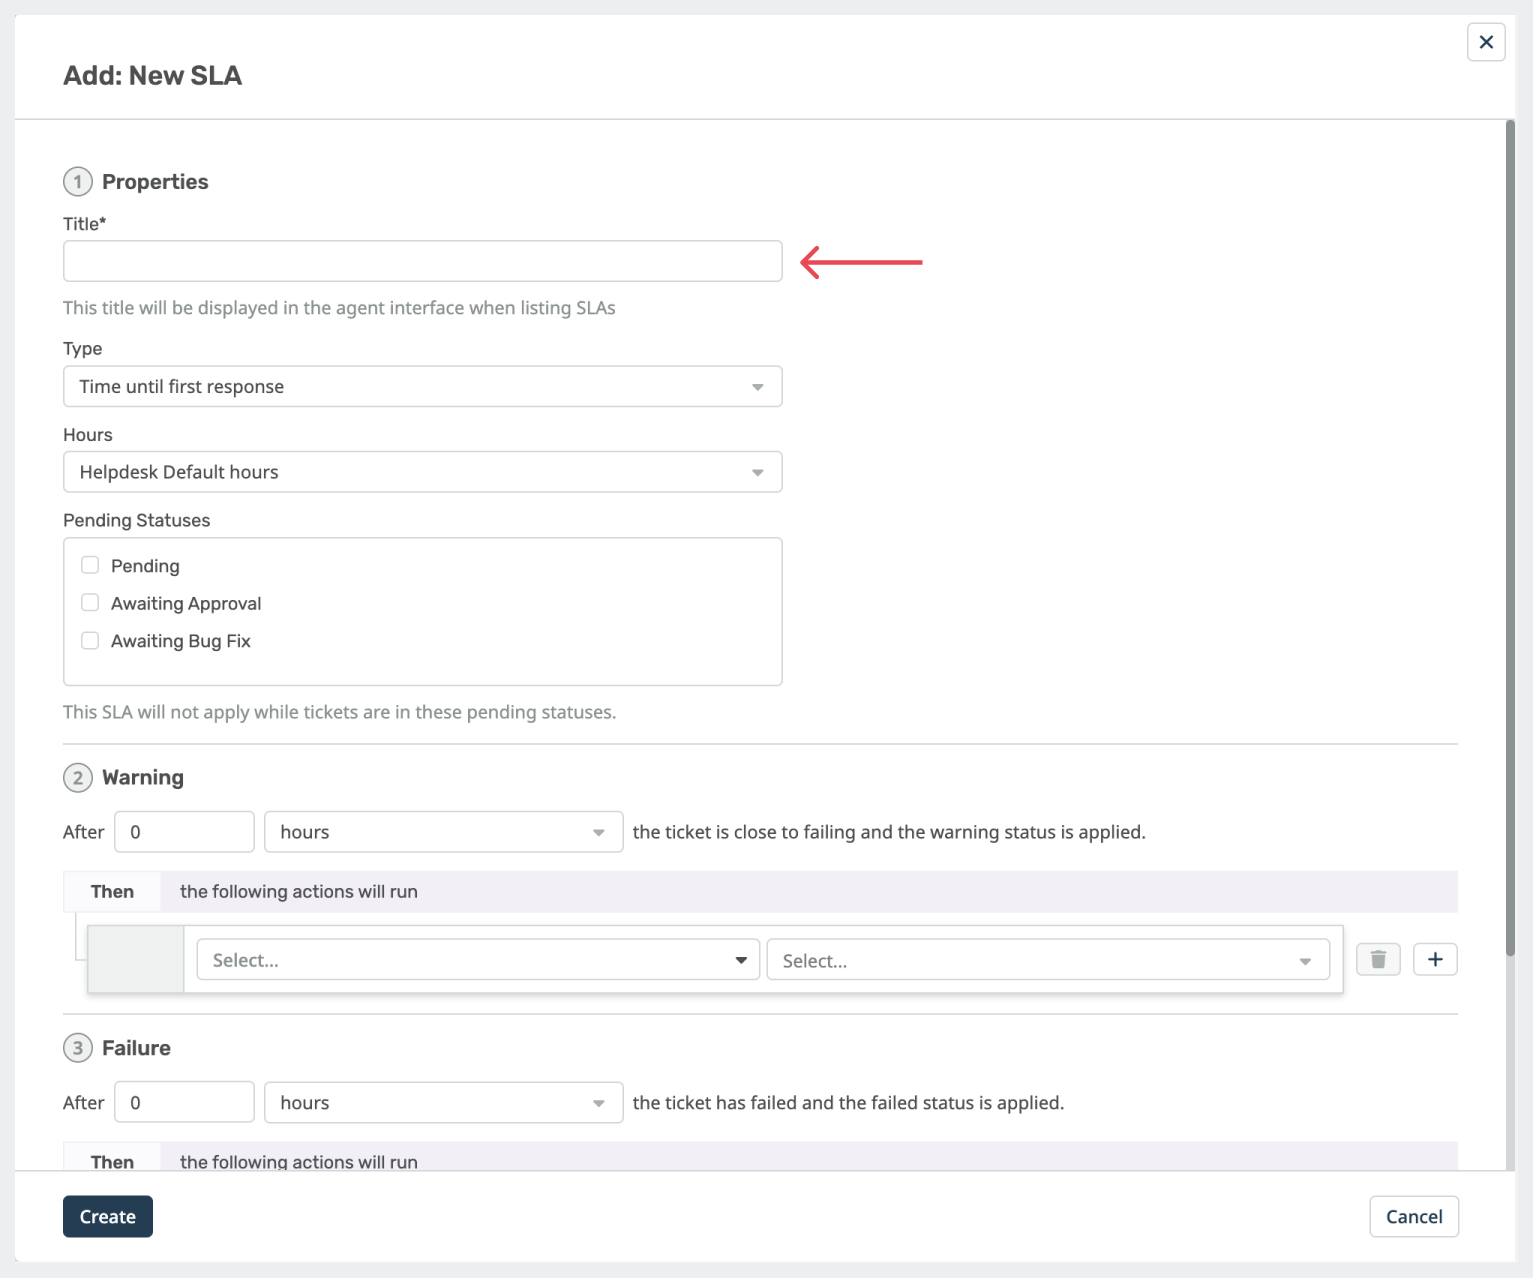
Give a title
Start by adding a meaningful title to your SLA. You should add a title that accurately describes your SLA's goal, so your team can easily understand the SLA's purpose.
Choose a type
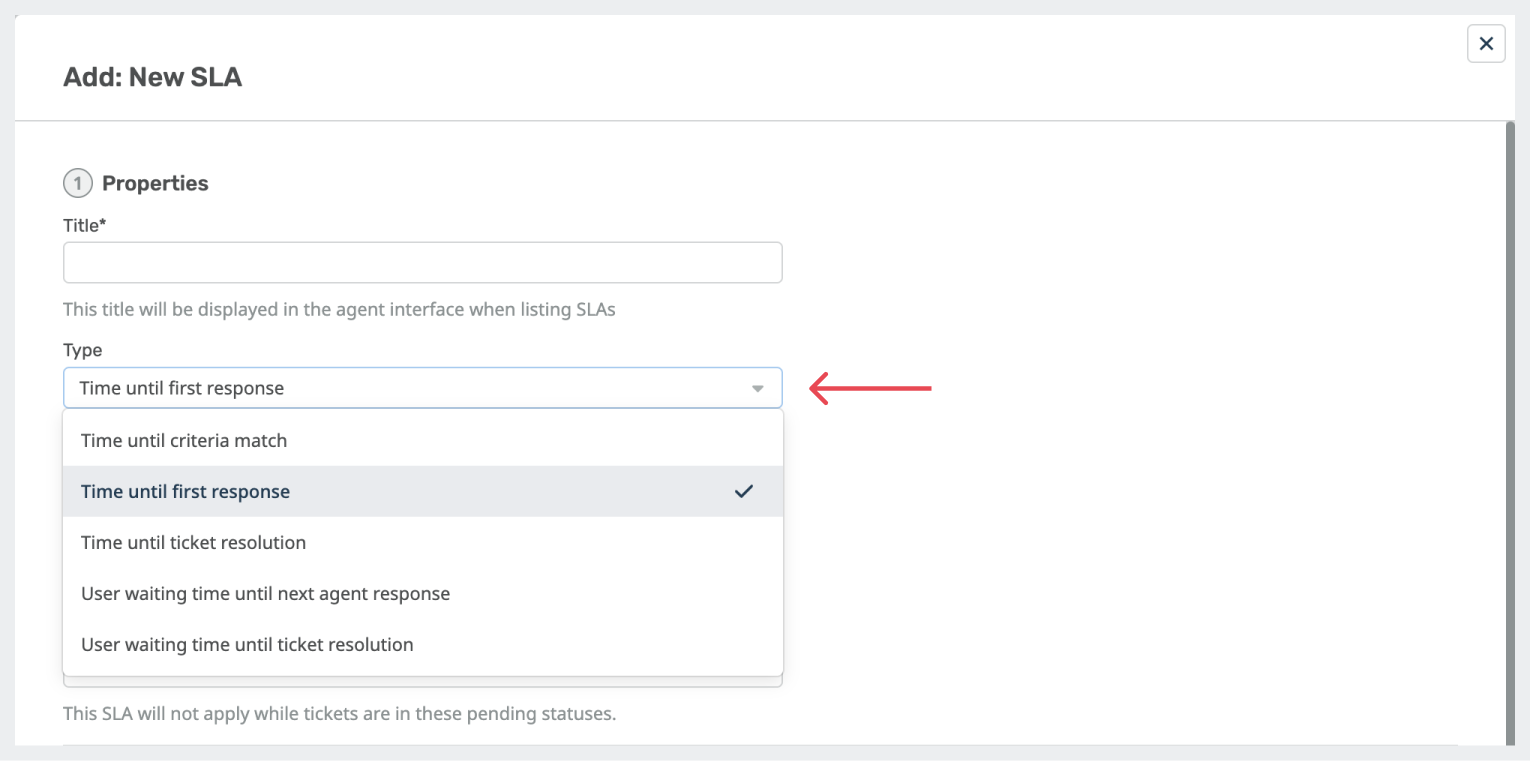
The SLA type controls how the SLA requirements are completed. There are five SLA types:
- Time until criteria match: The SLA is not satisfied until the ticket meets the defined criteria.
- Time until first response: The SLA is satisfied as soon as an Agent responds to the ticket.
- Time until ticket resolution: The SLA is satisfied when the ticket is resolved. The time from when the ticket was created to when it is resolved is counted towards the SLA countable time.
- User waiting time until next agent response: The SLA is not satisfied until the user has not received a response from an agent for a specified amount of time, such as 2 hours after the user first submits a ticket.
- User waiting time until ticket resolution: The SLA is satisfied when the ticket is resolved. The time that the user is waiting for a response from an agent (while the ticket is in the "awaiting agent" state) is counted towards the SLA countable time.
Define countable time
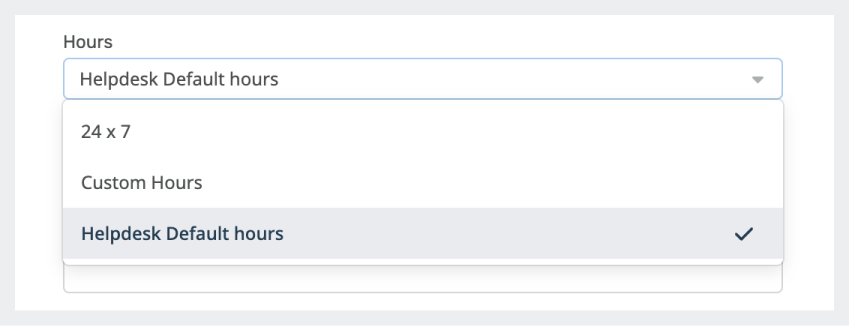
The SLA countable time is the time that is used to calculate whether an SLA has been met. There are three ways to set the SLA countable time:
- 24x7: All time counts towards the SLA countable time. This means that if a ticket is created at 3am on a Sunday, the warning/failure counters will start immediately.
- Custom Hours: Only time within the defined working hours and days counts towards the SLA countable time. You may also define specific holidays that will not be considered work days.
- Helpdesk Default Hours: This sets the SLA countable time based on your helpdesk's default hours. This means that if a ticket is created outside of your helpdesk's default hours, the warning/failure counters will not start until the next time your helpdesk is open.
Setting SLA Warning and Failure criteria
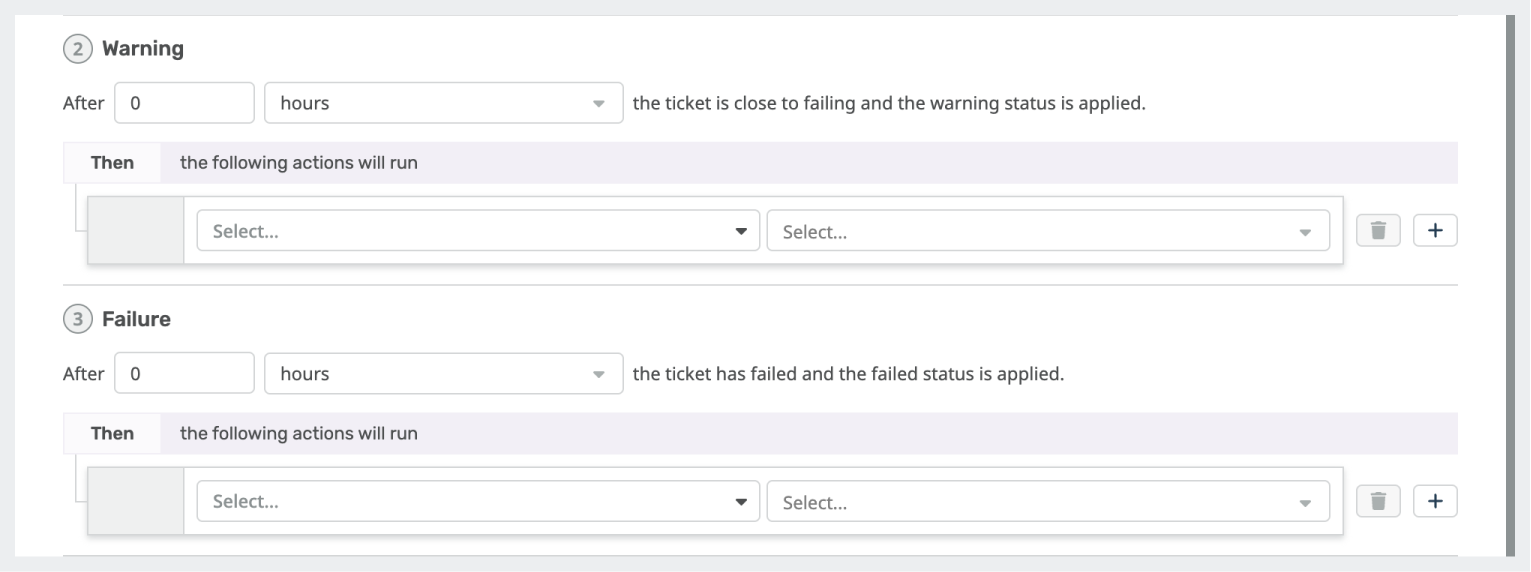
SLA warnings and failures are used to notify agents when a ticket is not being resolved within the SLA time frame. This helps to ensure that tickets are resolved promptly and that customers are not left waiting for a response. To define your SLA's warning and failure criteria, you will need to specify the amount of time before a waning or failure state is triggered.
What happens when an SLA Warning or Failure state is triggered?
When an SLA warning or failure state is triggered, the ticket will change color in the agent interface. A warning state will turn the ticket amber, while a failure state will turn the ticket red. This lets agents know that the ticket should be prioritized and that it is at risk of not being resolved within the SLA time frame.
Define Actions to take when an SLA Warning or Failure state is triggered
In addition to changing the color of the ticket, you can also define actions to take when an SLA warning or failure state is triggered. For example, you could automatically assign the ticket to a specific agent or send an email notification to the customer.
Applying SLA to Tickets
SLAs can be applied to tickets in several ways. You can:
- Allow agents to manually assign or remove the SLA - Agents will be able to assign or remove the SLA when viewing a ticket.
- Apply SLA to all tickets - All tickets created will have this SLA.
- Apply SLA to new tickets that match certain criteria - The SLA will apply to all new tickets that match the criteria you define.
- Apply SLA to new tickets that match certain criteria before triggers - This option allows you to apply the SLA to new tickets that match the defined criteria before any triggers are fired. This can be useful if you want to ensure that all new tickets are assigned this SLA, even if they are not triggered by a specific event.
Note that any changes to SLA settings will not be applied to existing tickets. For example, if you change the SLA time settings for a ticket that has already been created, the new settings will not be applied to that ticket. The new settings will only be applied to tickets that are created after the settings are changed.
You can also add and remove SLAs or change their status using triggers and escalations.
SLAs for Agents
Agents can see the SLA status of their tickets in a few ways:
In the navigation panel
You can group your ticket queue by SLA status, SLA name, or both SLA name and status.
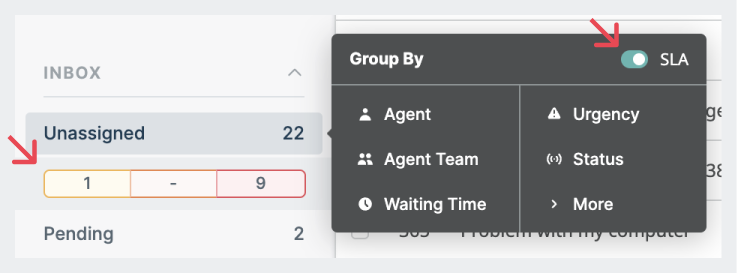

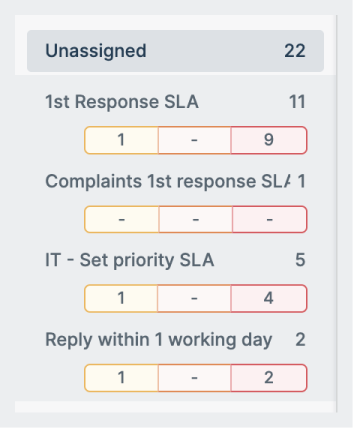
The SLA status grouping shows all tickets that are currently counting down, regardless of when they were created. For example, if a ticket is set to count down only during custom work hours, it will still be shown in the SLA status section even if it was created outside of work hours. For SLAs based on the first response or time until resolution, this includes tickets that are "awaiting agent" or "awaiting user." For SLAs based on user waiting time, this includes tickets that are "awaiting agent."
The numbers for each SLA listed here are broken down by status: green indicates that the SLA is on track, orange indicates that the SLA has passed the warning time, and red indicates that the SLA has passed the failure time.
Clicking the SLA title will show you a list of all the "ticking" tickets for that SLA. Clicking a specific counter will only show "ticking" tickets in that state for that SLA. By default, the list of tickets generated will display the tickets closest to failing (or the tickets the most overdue) at the top.
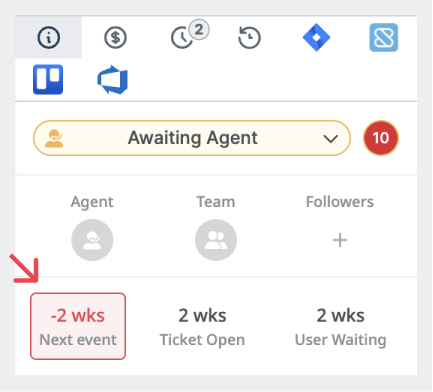
Agents can also see the SLA status at a glance when viewing a ticket. The SLA status is displayed in the ticket details pane. If agents have permission to add or remove an SLA from a ticket, they will be able to do so here.
