Deskpro supports the use of Elasticsearch technology to power faster, full-text search from the agent interface.
If you don't want to maintain your own local Elasticsearch server, or you want to quickly try out the improved search before installing Elasticsearch on your own server, you can use an external Elasticsearch service.
A hosted service reduces your maintenance burden, but has these disadvantages:
- it requires making helpdesk data accessible to a third party.
- search will not be quite as fast (expect a small but noticeable delay instead of near-instant results).
IMPORTANT: ElasticSearch 2.0 is now required.
Setting up hosted Elasticsearch
This article explains how to enable improved search on your helpdesk using a hosted Elasticsearch service (Found from elastic), which offers a 14-day free trial (at the time of writing).
1. Go to https://www.elastic.co/found, click Start Now and follow the instructions to create a Found account.
2. When you have completed the sign-up process, click New Cluster. We recommend selecting a 2.0 cluster
3. Select the geographical region where your Deskpro Download installation is located.
4. Leave the other settings on their defaults (you can enter a Name for your cluster at the bottom of the page if you want).
5. Click Create Cluster.
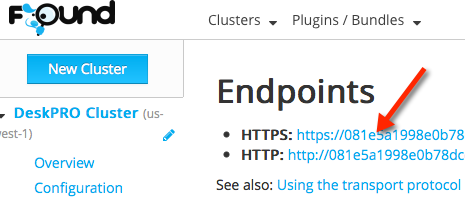
6. On the next screen, copy the URL of the HTTPS endpoint.

7. In the Deskpro admin interface, go to Server > Elasticsearch.
8. Click Enable Elasticsearch.
9. Enter the endpoint URL and click Save Settings.

Note that the Test Settings button currently falsely reports an error with Found.
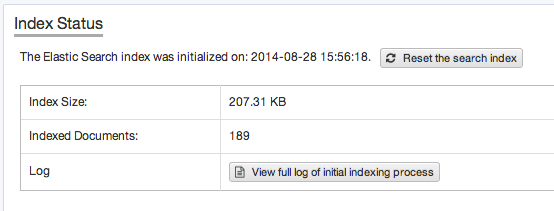
10. Elasticsearch will now index your helpdesk. You should see a "Status: Waiting" message, then after a minute (when your next cron job/Scheduled Task runs) a "Status:Running" message. When indexing is complete you will see an Index Status like this at the bottom of the page.

Full-text search should now be available from the agent interface. Test it by searching for a term that's in a ticket message, but not in the ticket subject. The ticket should be returned in the search results.
Access control
By default, anybody knowing your cluster's ID can access it. You should now visit your cluster's Access Control page and limit access using an Access Control List (ACL).
Use the "Allowed IP-ranges over SSL" sample ACL and enter the public IP address(es) of your Deskpro server(s), then click Save. (If you're not using an HTTPS endpoint, delete the - ssl: require: true rule).
Note that if your Deskpro installation is spread over multiple servers, it's the webservers, not the database servers, that require access to Elasticsearch.
Cluster resources
Note that the Found trial service offers a single Elasticsearch cluster with limited resources (256MB memory and 2GB disk space) unless you supply credit card details. For a larger helpdesk, this may not be adequate.
You can see the resource usage for your cluster on its Overview page on the Found site (the same page where you got the endpoint URL).

For production use, you should ensure that you select a service plan with adequate resources and fault tolerance to cope with the needs of your helpdesk.

