


You can make the best decisions when you’re armed with analytics. Knowing how you and your team are performing means you’re much better equipped to improve the efficacy of your support.
Deskpro allows you to build beautiful reports that reveal exactly what matters most to you. Create limitless combinations of statistics without a degree in SQL.
We understand that you need your support operation to be driven by data. Here’s how to build your first dashboard:
To create a new dashboard, click the + Add button under Custom Dashboards in the Reports Sidebar.
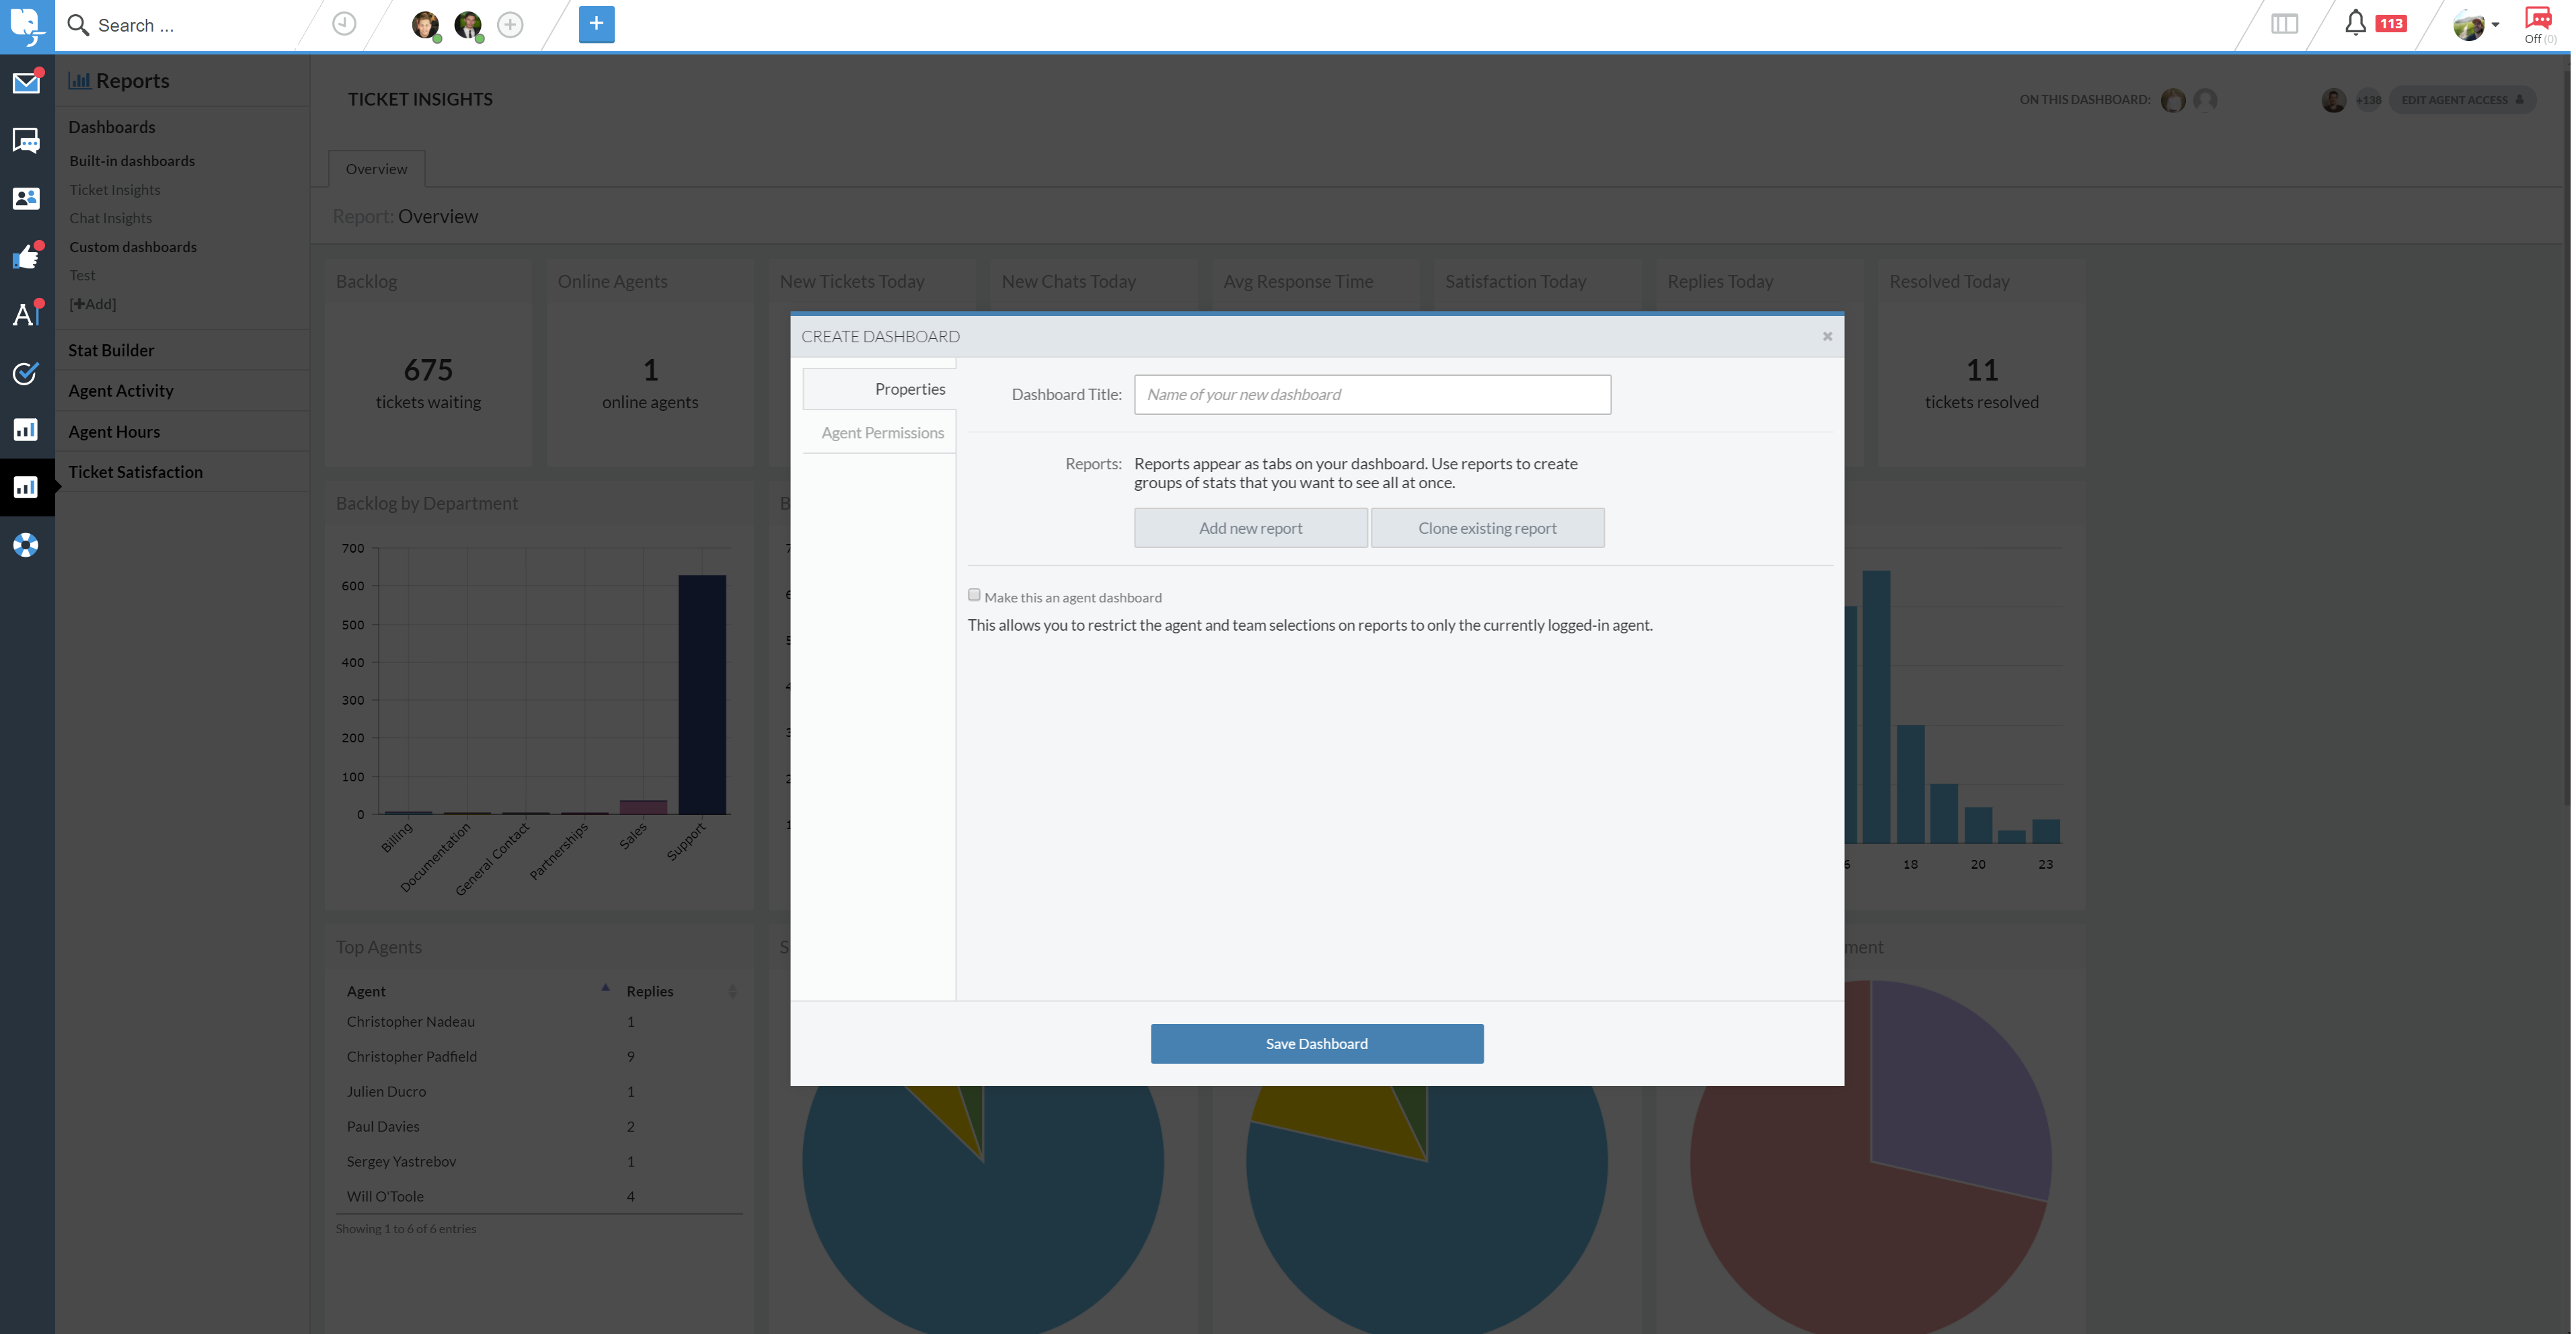
The Create Dashboard window will pop up. Under the Properties tab, enter the name of your new Dashboard.
Click Add new report, and enter the name of the new Report. You can add more Reports to the Dashboard, or move on. Click Save Dashboard to create the Dashboard.
To add data to Dashboard Reports, click the Add Widget button underneath the report title.
Each statistic describes the data it will display when added to the Dashboard Report, with data variables shown as $[example].
Once you have selected a statistic, it will then prompt you to choose values for each of the variables the statistic contains.
For example, if you have selected the statistic ‘Number of tickets created ${date} grouped by ${ticket}, you will be prompted to select the value for the date variable, and a ticket variable.
Once these have been selected, click Next. You will now be prompted to enter the name of the widget.
Select the display type for the widget. Selecting a display type will generate a preview of the widget on the right hand side of the window.
Once you have selected a display type you are happy with, click Save.
The new widget will now be displayed within the Dashboard Report.
The layout of Dashboard Reports can also be highly customized. You can do this by clicking the Dashboard Layout button.
The rest is up totally up to you.
For more information on creating reports, refer to our guide.
Or read our next article in the 'Getting Started' series on setting up integrations.
Add a comment
Please log in or register to submit a comment.