Deskpro aims to make it as quick and easy as possible for you to start solving your customers’ issues.
Tickets in Deskpro reveal everything you need to truly understand a customer issue - all in one place.
Convenient automation features and ticket actions also make managing and replying to tickets as easy as possible.
Learn how to view, manage, and reply to your tickets below!

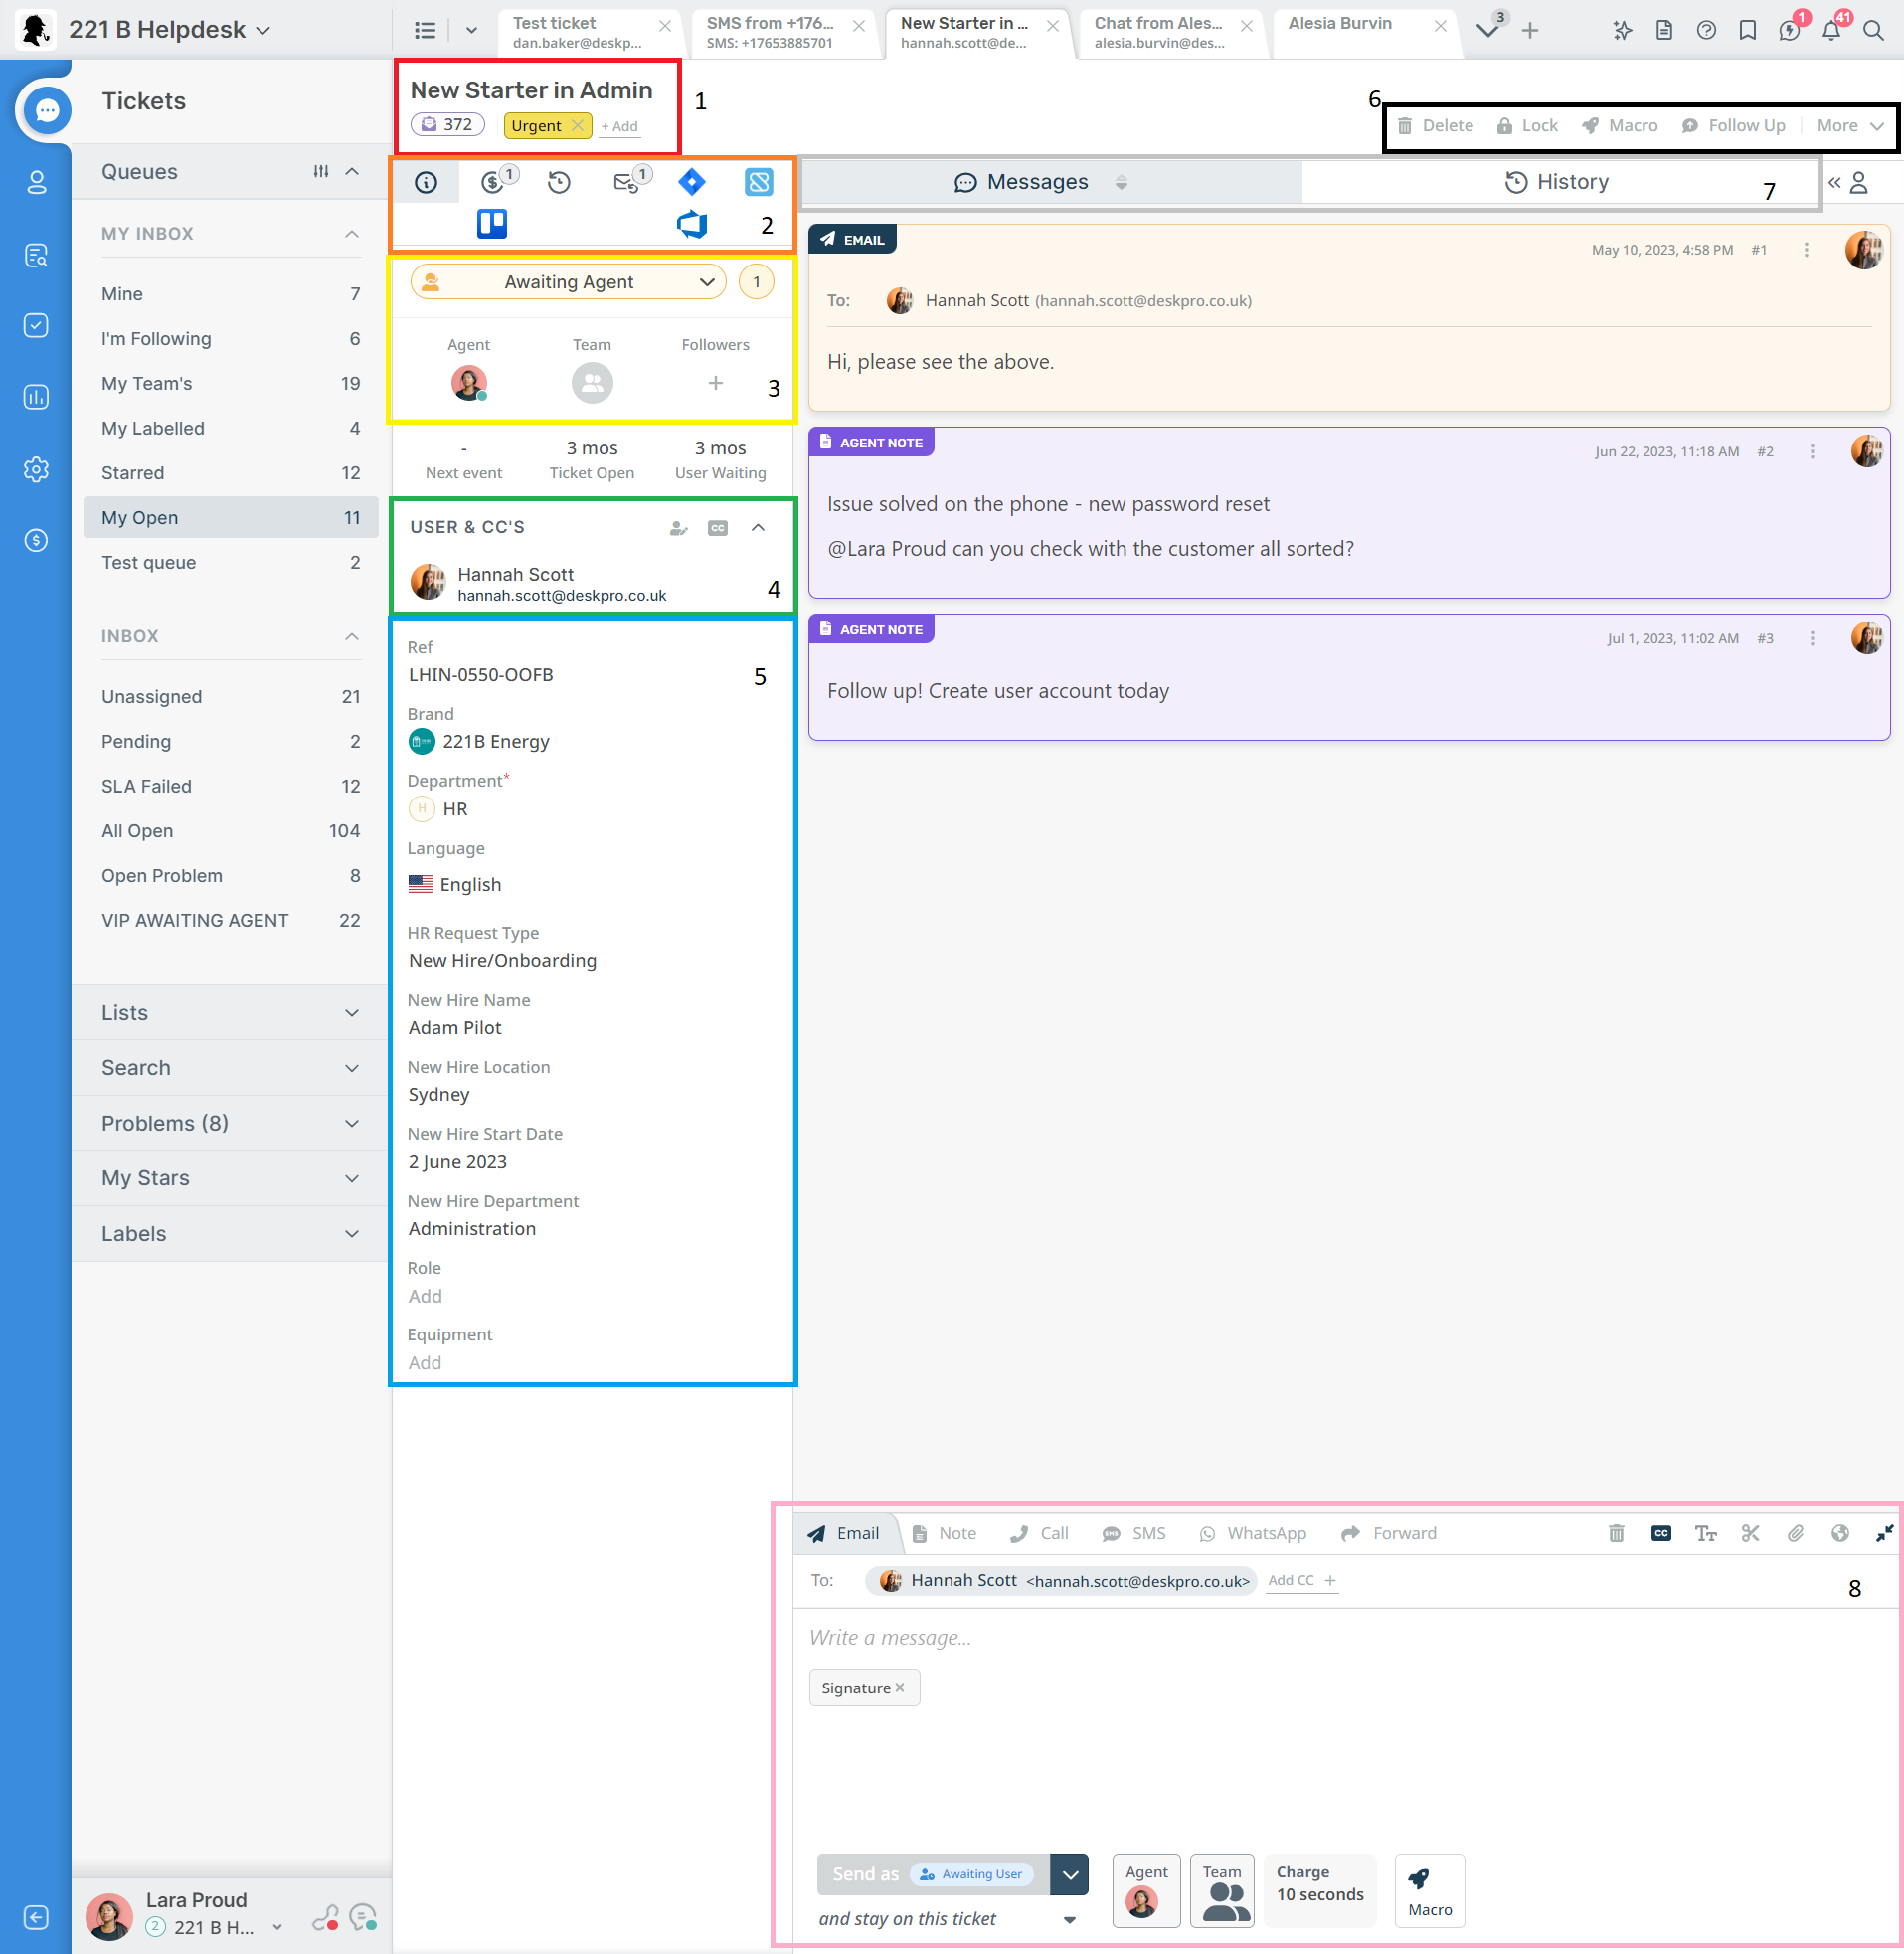
Red: View the ticket title and edit by clicking on it, view the ticket’s ID number, add labels to the ticket
Orange: Switch from the default view of ticket properties to one of our ticket actions and apps
Yellow: Set the ticket’s status and urgency, change the assigned agent and agent team, and add followers to the ticket
Green: Change the user who is set as the ticket owner and add CCs
The user is the customer you are communicating with; any people who are added CCs will also receive messages you send to them
Blue: View and edit the ticket’s fields
The fields that appear here are controlled in admin like this
Black: Ticket actions give you more controls to interact with your ticket. Press the More button to see a full list.
Many ticket actions will persist in the area marked 2 once in use for easy access.
Grey: Switch between viewing the ticket messages and the ticket’s history (and the ticket summary if one has been added via the ticket actions menu (7))
The arrow icon next to “Messages” will let you switch the display order of the ticket’s messages. Choose whether you’d like the most recent message to appear at the top or bottom of your screen.
Pink: The reply box lets you send messages to your user through any channels you have set up or add a note to the ticket for your fellow agents to read.
The “TT” button in the toolbar will give you access to more formatting options.
Switch between reply box tabs to change which channel you would like to use.

