You can integrate your Google Calendar with Deskpro using the third party Zapier app.
This will allow you to create tickets directly from Google events.
You can use this integration to create tickets for new events and also existing and recurring events.
1) Create a Zapier account.
You can create a Zapier account for free and you will get a fully functional 14 day trial.
They operate a 'freemium' pricing model based on the complexity of the integrations you are using and the frequency you use them (you can read more about this on their pricing page ).
2) Open the 'Zap' editor
Hit 'Make a Zap' in the top left corner of your Dashboard (a 'Zap' is a term Zapier use to describe each integration you create):

Once selected you will be taken to the Zap creation page.
It's structured along the lines of Trigger > Action
In this instance we would like an occurrence in Google Calendar to launch an action in Deskpro hence we will select google calendar as our first app.
3) Setup the Google Calendar integration.

Once you've specified Google Calendar as the app you'll need to specify how this will instigate an action in Deskpro.
a) Choose app & event
There are three options here you can use to trigger a Deskpro action. New Event, New Event Matching Search (a new event that matches specific criteria) and Event Start (run the action in Deskpro x amount of time before the event is due).

In this example, I will run through 'Event Start' as it is broadly the most useful as it allows you to create tickets x amount of time before an event begins . However, the same principles can be applied to the other two options.
b) Choose account.
Choose an existing account or add a new Google account. If you add a new account this will launch a Window where you can enter your Google credentials for authorization.
c) Set up trigger
You'll then need to specify when and where the zap should run:

- Specify the calendar under the account.
- How long before the Google event you would like the action to run in Deskpro (the default is minutes but you can specify the unit if required).
- The search term allows us to restrict ticket creation based on words in the event. In this example I only want to create tickets for events with the words 'new' and 'starter' in them.
d) Test trigger

4) Setup the Deskpro Integration
Once the test has been completed, click on 'Continue' and you'll be taken to the Action element of the integration. This is where you can select Deskpro:

a) Choose app & event
Again there are multiple Event options here.
- Create Ticket
- Create Organization
- Create Person
- Add Message to Ticket
- Update ticket
- Find Person
- Find Organization
- Find Ticket
For this example we'll use 'Create ticket', as we'd like to create a new ticket for our Google Calendar Event.
b) Choose account
Click on 'Sign in to Deskpro'
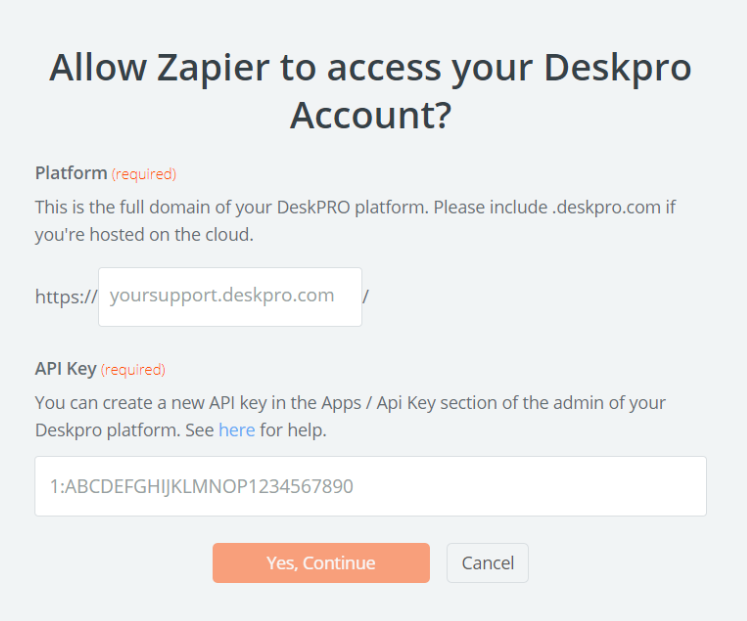
Choose 'Add new account' and you'll then be taken to an authentication page:

Specify your helpdesk URL and your API key (there's information on generating API keys in our Guides if needed).
c) Set up action
This is where we specify the criteria of the ticket we will create:

This will create a ticket where:
- Department is 'Support'
- Subject line is the event summary
- Message contains 'Our new starter begins in two weeks'
- User on the ticket will be 'Matthew Wray' (Matthew Wray is the owner of the calendar and an existing user in Deskpro).
d) Test action

You'll have the option to test and continue. In this instance though when the test has been run successfully it will create a ticket in your helpdesk:

You'll also see the option at the bottom of the page to turn on the Zap:

Turn it on and a ticket should then be created when you reach the time specified before the event (in this instance 15 days).

