


The steps in this article uses the Beta Jira app and the Cloud version of Jira, however the same should apply for the On-Premise version of Jira too. Throughout this guide, we will create a webhook that will change the status of a Deskpro ticket to 'Awaiting Agent' whenever a comment is added in Jira to one of its linked tickets.
1) Install the Jira App
Go to Admin > Apps > Apps. From the list of apps, locate the Jira v2 entry and click on it to start the installer.
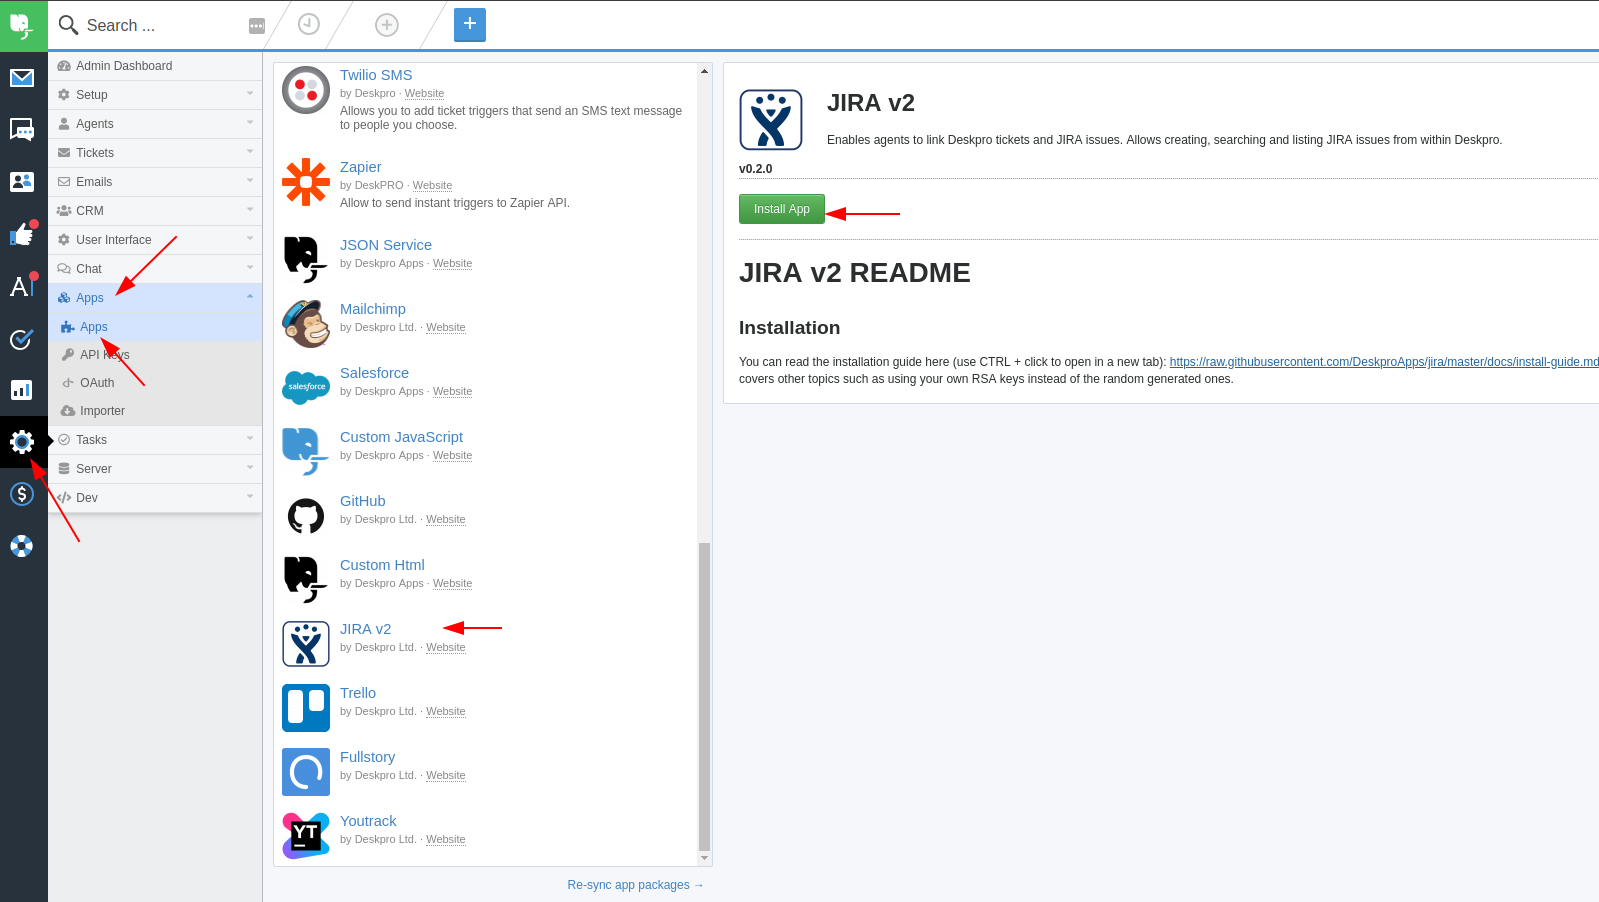
You can follow the install guide here: https://github.com/DeskproApps/jira/blob/master/docs/install-guide.md
2) Create the Deskpro Webhook
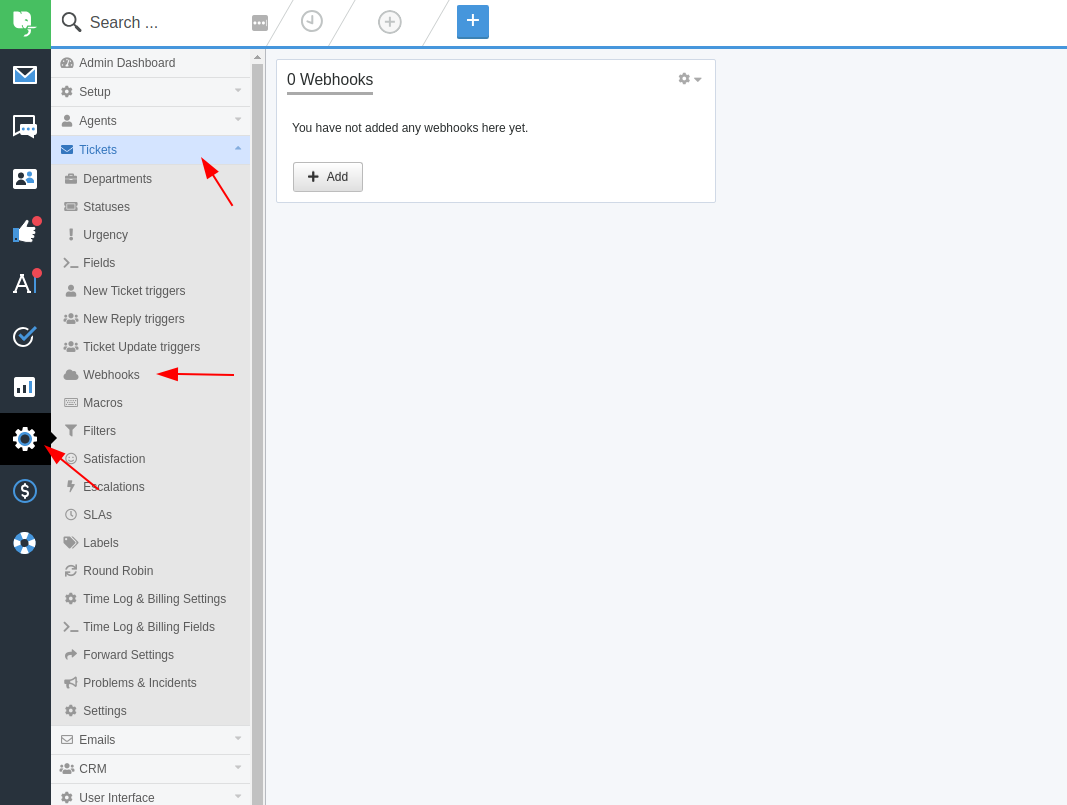
When the Jira app is installed, it creates a new custom field which will store the information about the linked tickets. We will use this field in our webhook. Go to the 'Tickets' section in the Admin area and click on 'Webhooks':
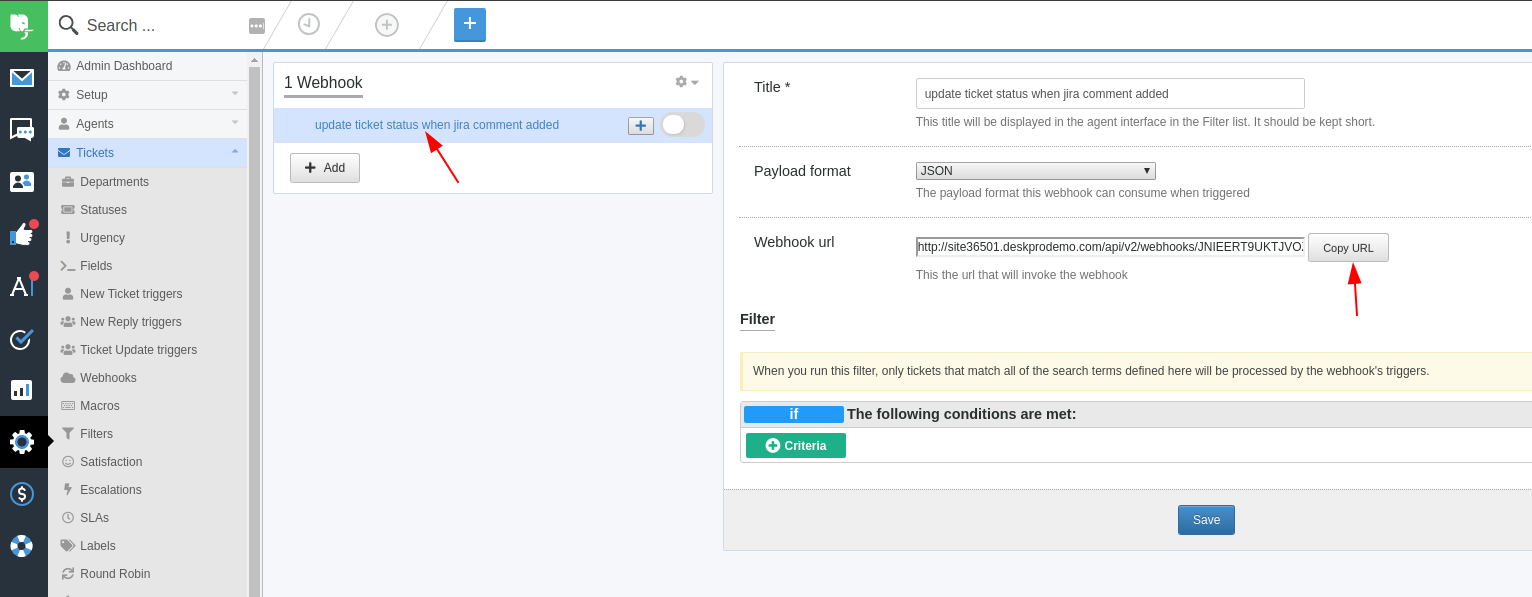
We do not need to configure the ticket at this stage, we just need to get its URL so we can configure the Jira webhook. After that we will return to Deskpro and finish the configuration:

Make sure that you choose JSON for the payload format. Skip the filter configuration for now and just click 'Save '. Then click on the webhook title to bring up the webhook URL and copy it to clipboard:
3) Setup the Jira webhook
Once we know the URL for the Deskpro webhook, we can go back to Jira. Locate the Jira Settings menu, then navigate to 'System' and open the 'Webhooks' section:
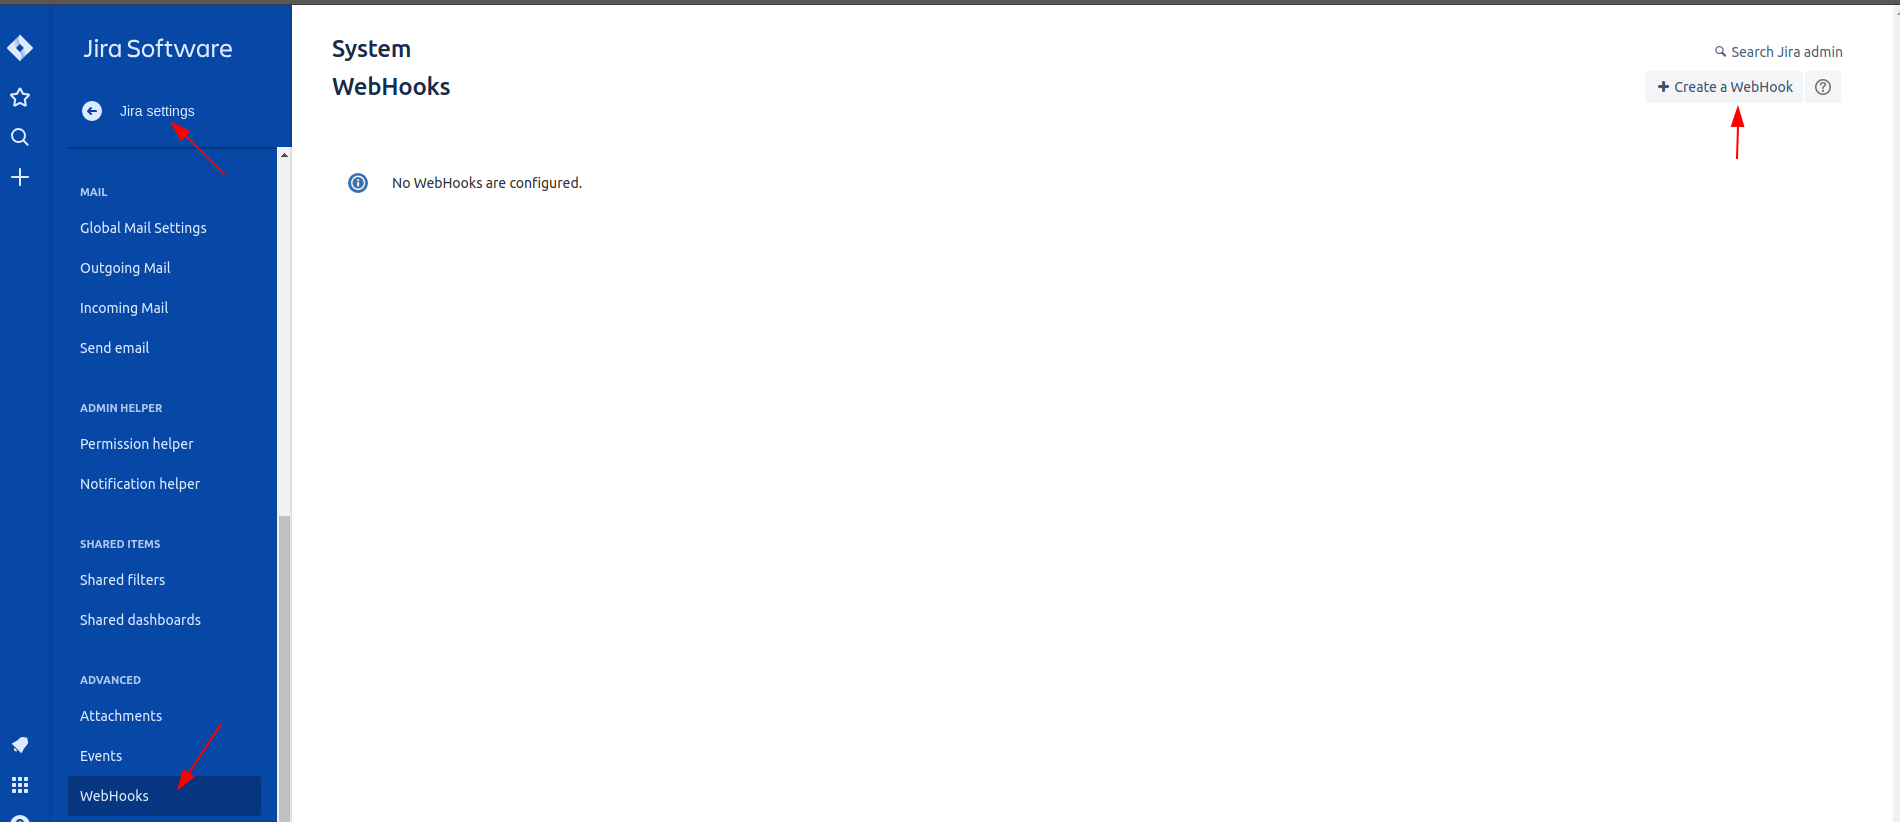
Fill in the URL, Name and Description fields. Be sure to choose the 'Comment created' event that will activate this webhook. Scroll down the page and click 'Create':
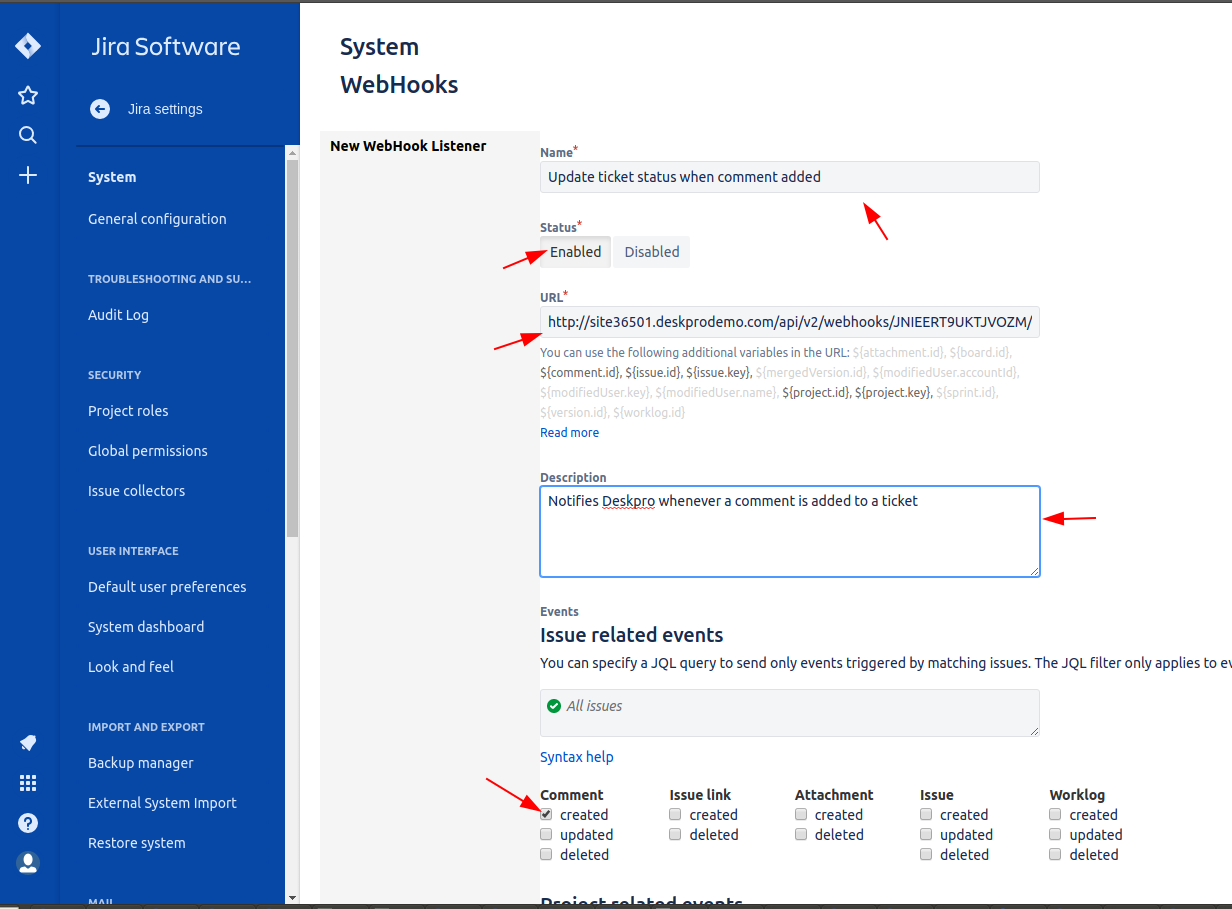
Once this is activated, whenever a comment is added to a ticket, Jira will make a request to Deskpro sending a JSON payload with the following structure:
{
"timestamp"
"event"
"user": {
--> User shape
},
"issue": {
--> Issue shape
},
"changelog" : {
--> Changelog shape
},
"comment" : {
--> Comment shape
}
}
We can use this structure to configure the Deskpro webhook's trigger to fire only when a comment is added. You can read more about the structure of the JSON payload and Jira webhooks here.
Should you need to inspect a given payload or to debug a Jira webhook, read this article: https://confluence.atlassian.com/jirakb/how-to-collect-data-for-atlassian-support-for-troubleshooting-jira-webhooks-397083035.html
For the purpose of this guide, we are expecting the following payload:
{
"timestamp":1544793770760,
"webhookEvent":"comment_created",
"comment":{
"self":"https://dp-ticket-114418.atlassian.net/rest/api/2/issue/10000/comment/10003",
"id":"10003",
...comment fields
},
"issue":{
"id":"10000",
"self":"https://dp-ticket-114418.atlassian.net/rest/api/2/issue/10000",
...issue fields
}
}
}
4) Configure the Deskpro webhook
We are now in a position to finish the setup on the Deskpro side. Navigate to the webhook we created before and add a criteria to its filter:
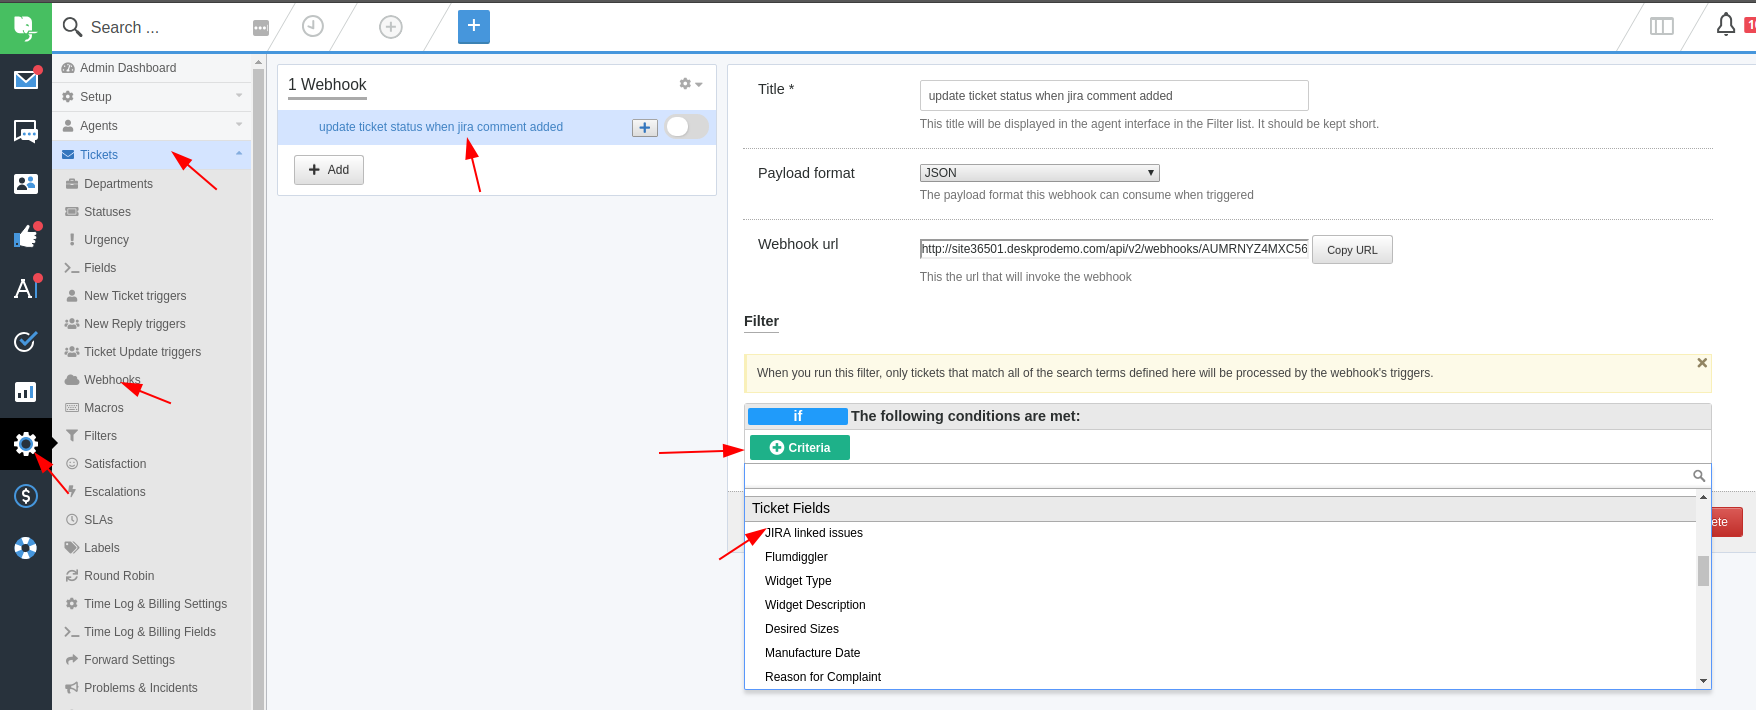
Scroll through the list of available criteria until you reach the Ticket Fields section. There you should find a field named 'Jira linked issues' which was created when the Jira app was installed. This is a custom field which contains a list of all the linked Jira issues. Choose this field and use the contains predicate with the following value: twig:{{webhook.data.issue.key}}
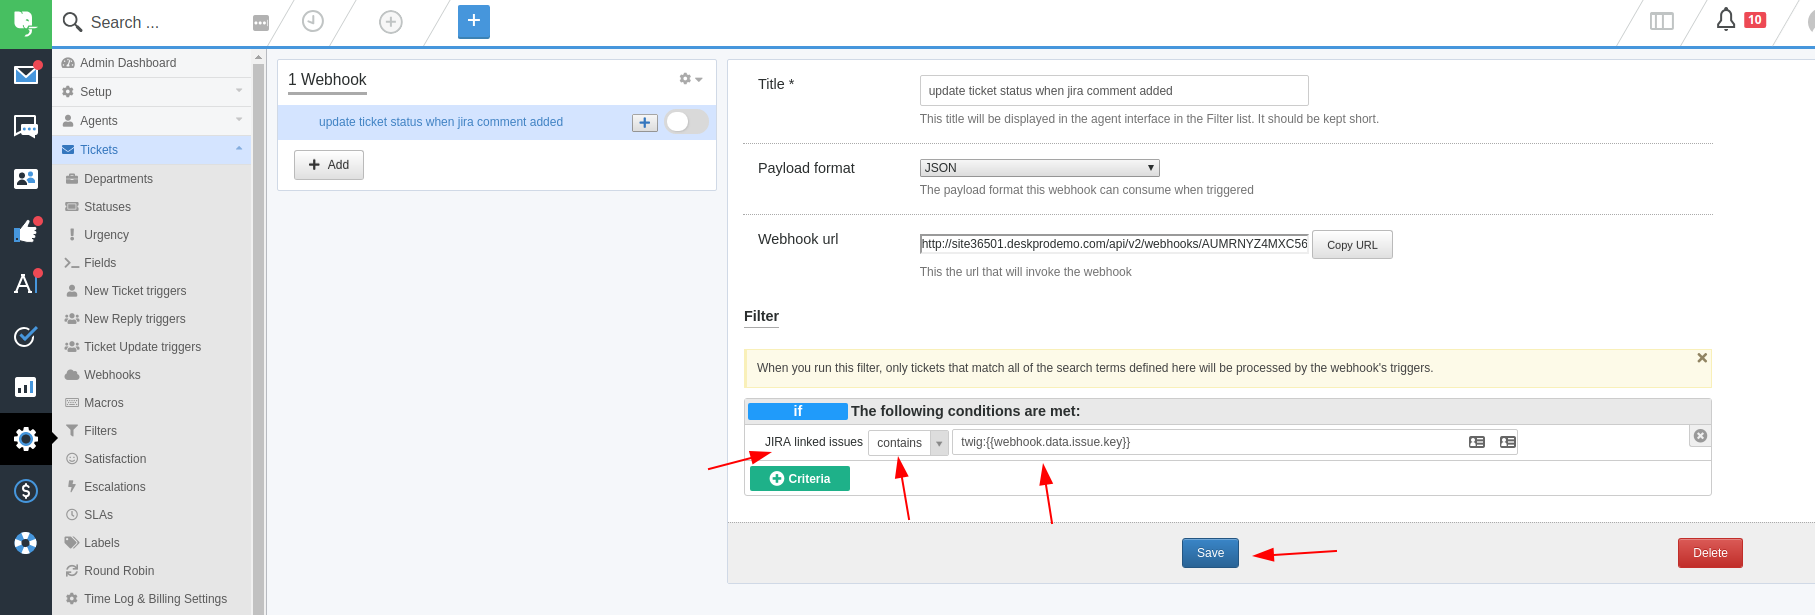
This filter will select all the Deskpro tickets which have been linked to the Jira issue from our webhook invocation.
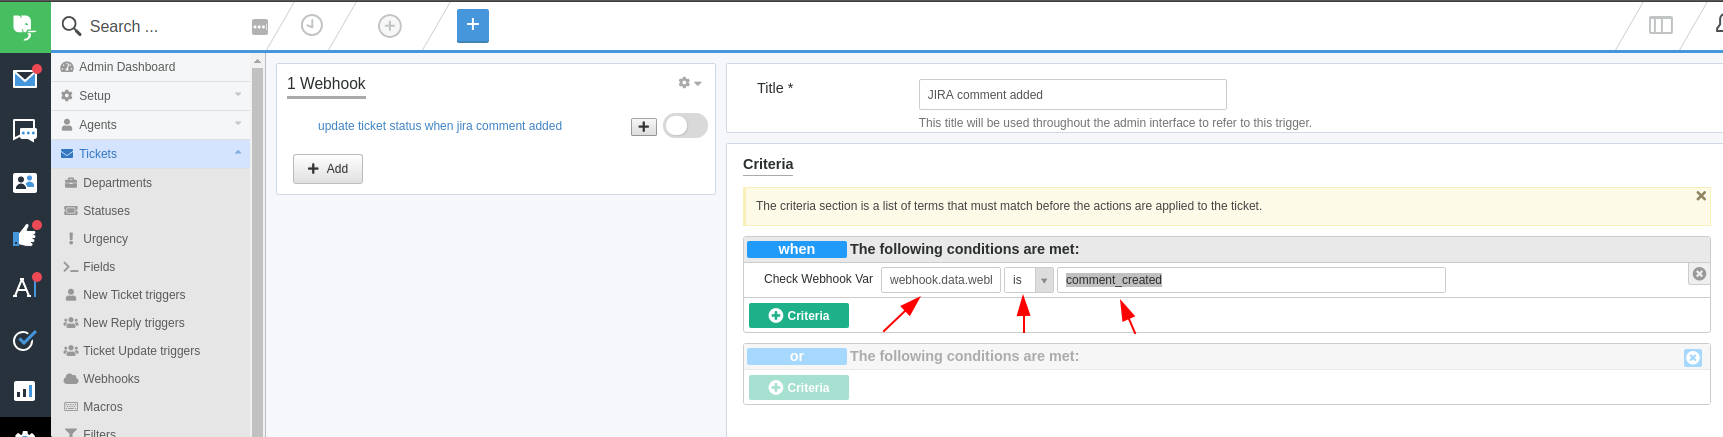
The next step is to add trigger to the Deskpro webhook. This trigger will check the payload Jira sends to Deskpro and will activate the webhook if a comment was created. Scroll down the criteria list and choose 'Check Webhook Variable':
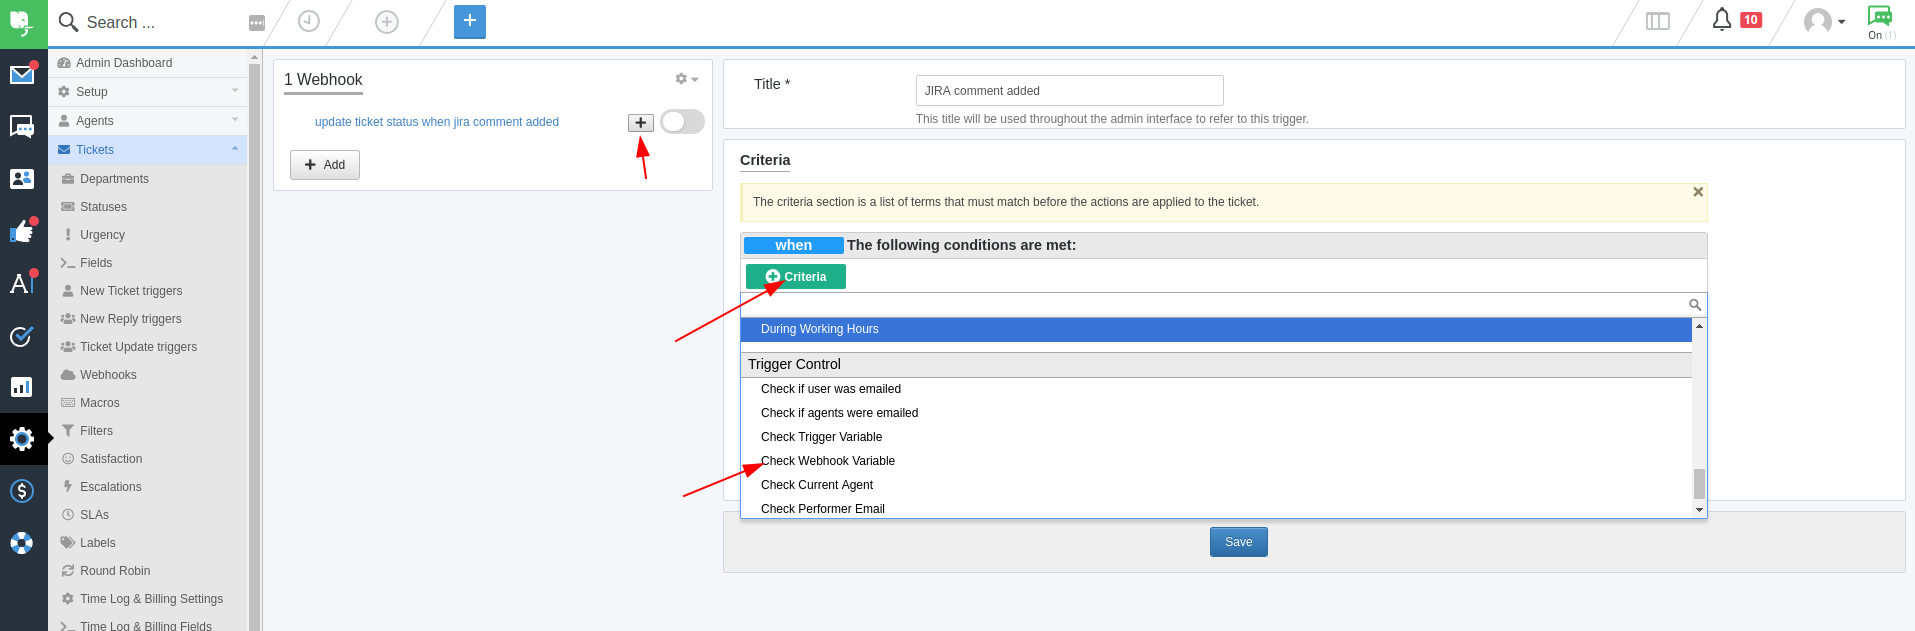
The webhook variable name is webhook.data.webhookEvent and represents the path to a property from the payload received by the webhook, prefixed with webhook.data . In this case, the property we want to check is the top-level one, webhookEvent so the path is .webhookEvent
We want to check that this variable is equal to comment_created so we fill in the criteria form with the following values:
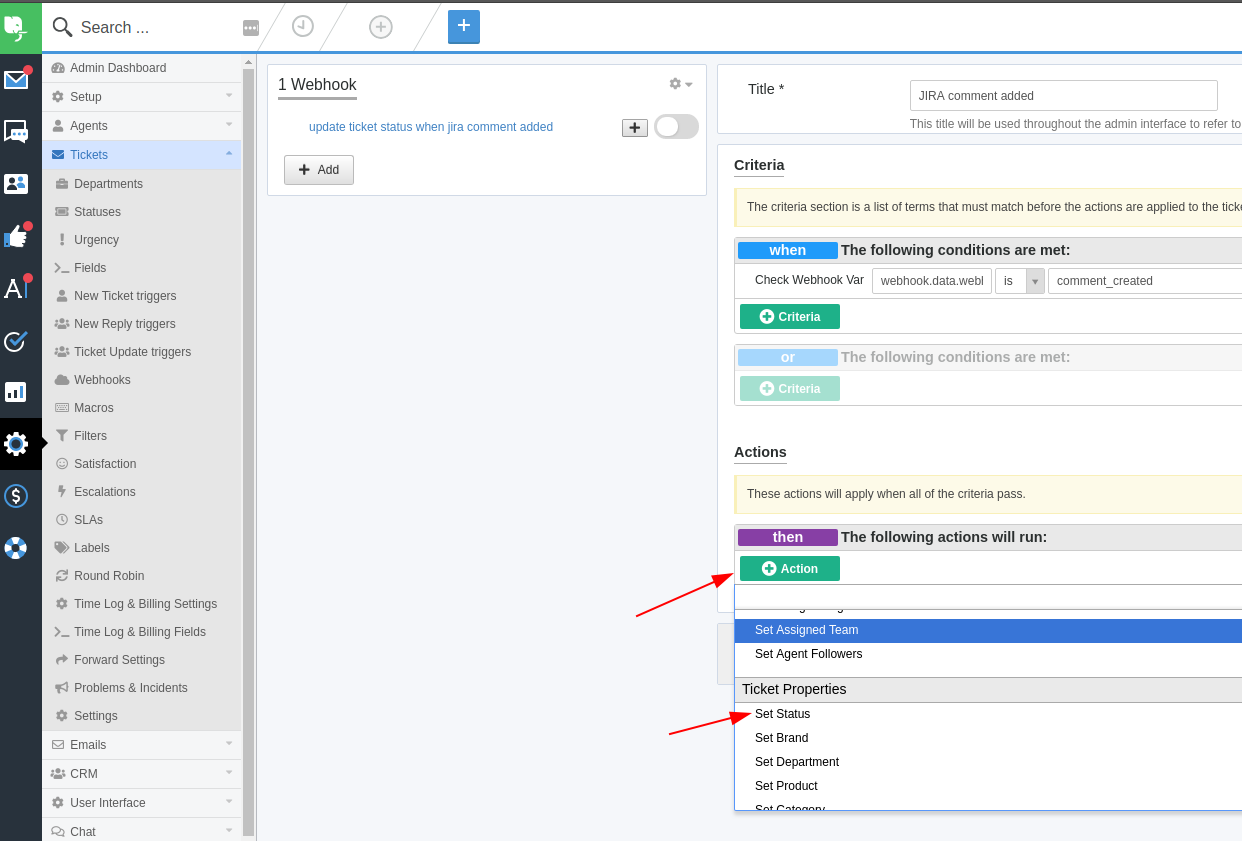
The Action is the only thing left to configure. Click the 'Action' button and choose the 'Set Status' action:
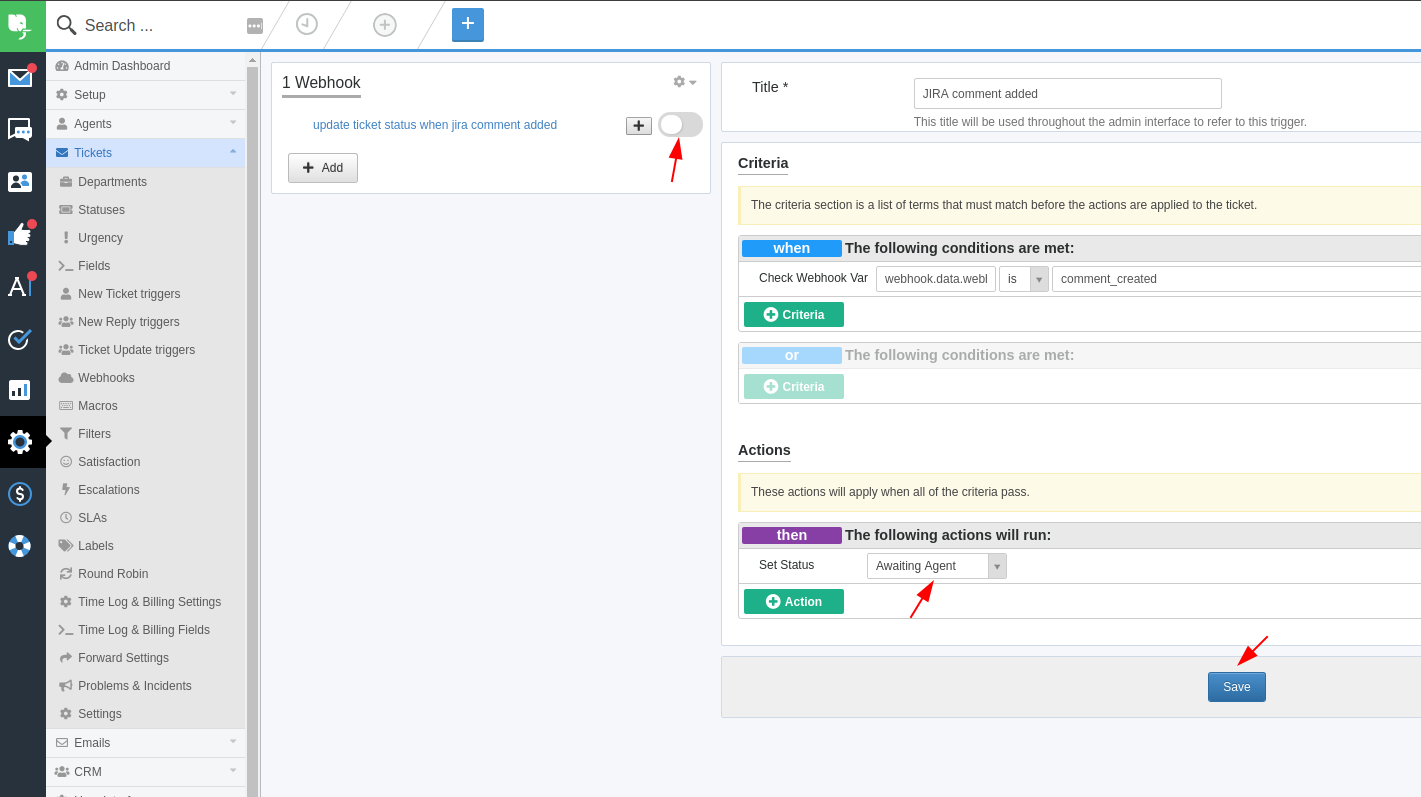
We want to set the ticket status to 'Awaiting Agent 'so our trigger form should look like this before saving it and then enabling the webhook:
Now use the Jira app and link a Deskpro ticket with a Jira issue. Make sure the Deskpro ticket has a status other than 'Awaiting Agent' or you will not see the difference! In a different tab, open Jira, navigate to the linked issue and add a comment.
When you switch back to Deskpro, you will notice the status has now changed.