


In this article, we’re going to describe a series of common API use cases to get you started using the Deskpro API.
Deskpro provides a REST API; an extensive list of all API endpoints can be found in our API reference document. We use widely supported JSON as a data format, meaning almost any system can talk to Deskpro. You can use the Deskpro API to access all functions of the system, helping you to automate reading and writing data to Deskpro.
Authentication
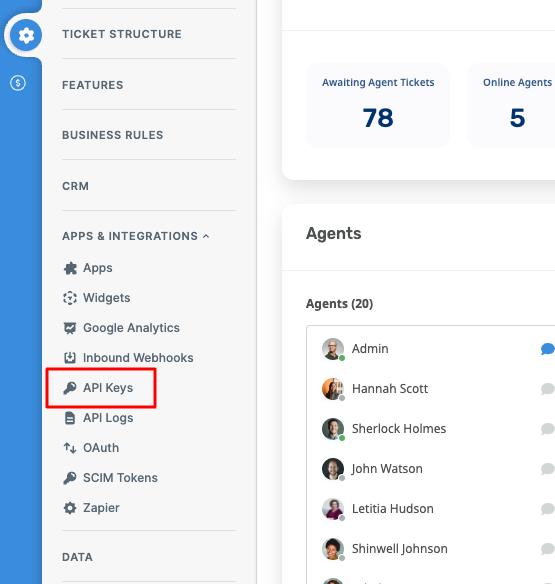
The simplest way to authenticate is by using an API key. You can create an API key via Deskpro’s admin interface, under Apps & Integrations > API Keys
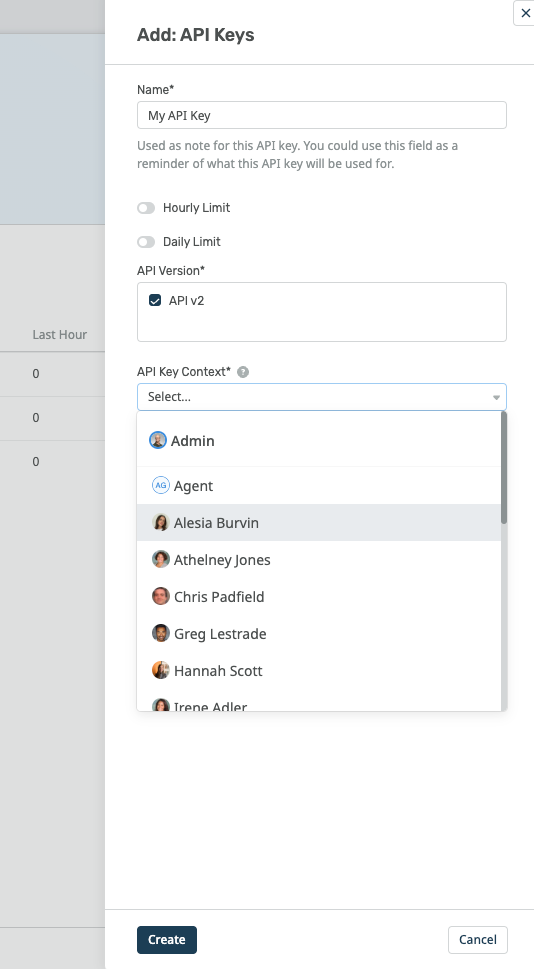
Create a new API key and enter the following information:
-
Name: this can be anything you like, it’s to identify the API key
-
API Version: select API v2
-
API Key Context: select a user you’d like to consume the API as. E.g. all requests to the API using this API key will be in the context of the selected user
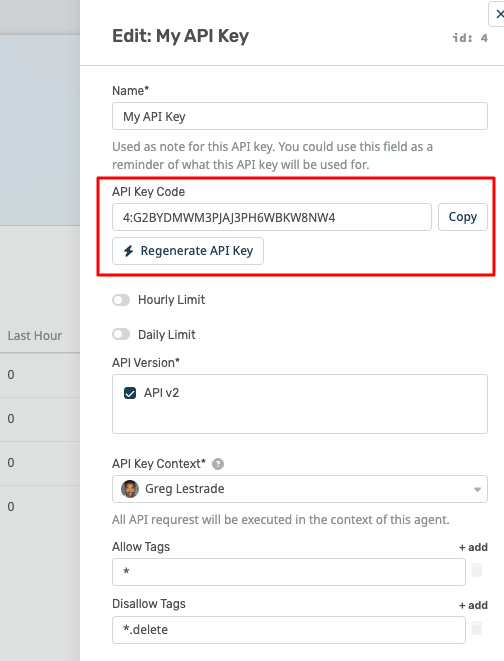
Once you've created your new API key, click "Create" and you'll see your new API key appear in the list. Click on it and you should see the following:
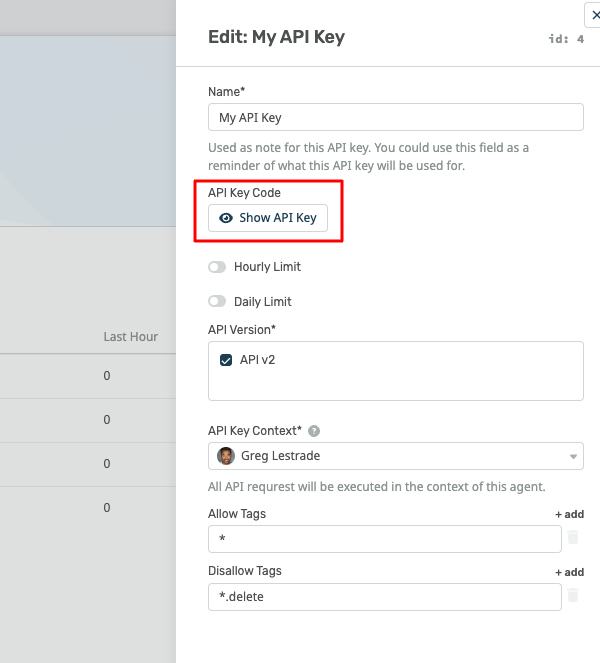
Click "Show API Key" and copy the API for later use.
Ok, so now that we have our authentication key, let's use it to do some stuff :)
Creating a Ticket
Creating a ticket is quite a common use case. You could have another system create tickets automatically when certain events happen. For example, let's say we had a CRM system that when a customer request/question comes in, a ticket is automatically created in Deskpro.
To get started, we recommend using a REST client like PostMan or you can even use cURL from your command line.
To create a ticket in Deskpro you can do the following:
POST https://my-helpdesk.deskpro.com/api/v2/tickets
Content-Type: application/json
Authorization: key 4:G24M3K6Y3R3H8DN9B6QGH3NW4
{"subject": "My First Ticket",
"person": "joanne.bloggs@example.com",
"message": {
"message": "<p>This is a rich <b>HTML</b> message</p>",
"format": "html"
}
}
Creating a Ticket with an Attachment
Creating a ticket with attachments contains extra steps and we first need to upload the attachments to Deskpro and then "link" them to the new ticket.
In order to upload an attachment, or blob (a fancy name for a binary object), you must first send a "form-data" request to the blob endpoint. The best way to do this is by using a REST client like PostMan to do this. In the screenshot below we show uploading a file to the POST /api/v2/blobs/temp endpoint via PostMan. You will need to ensure that your API key has access using the blobs.blobs.post_temp access control tag.
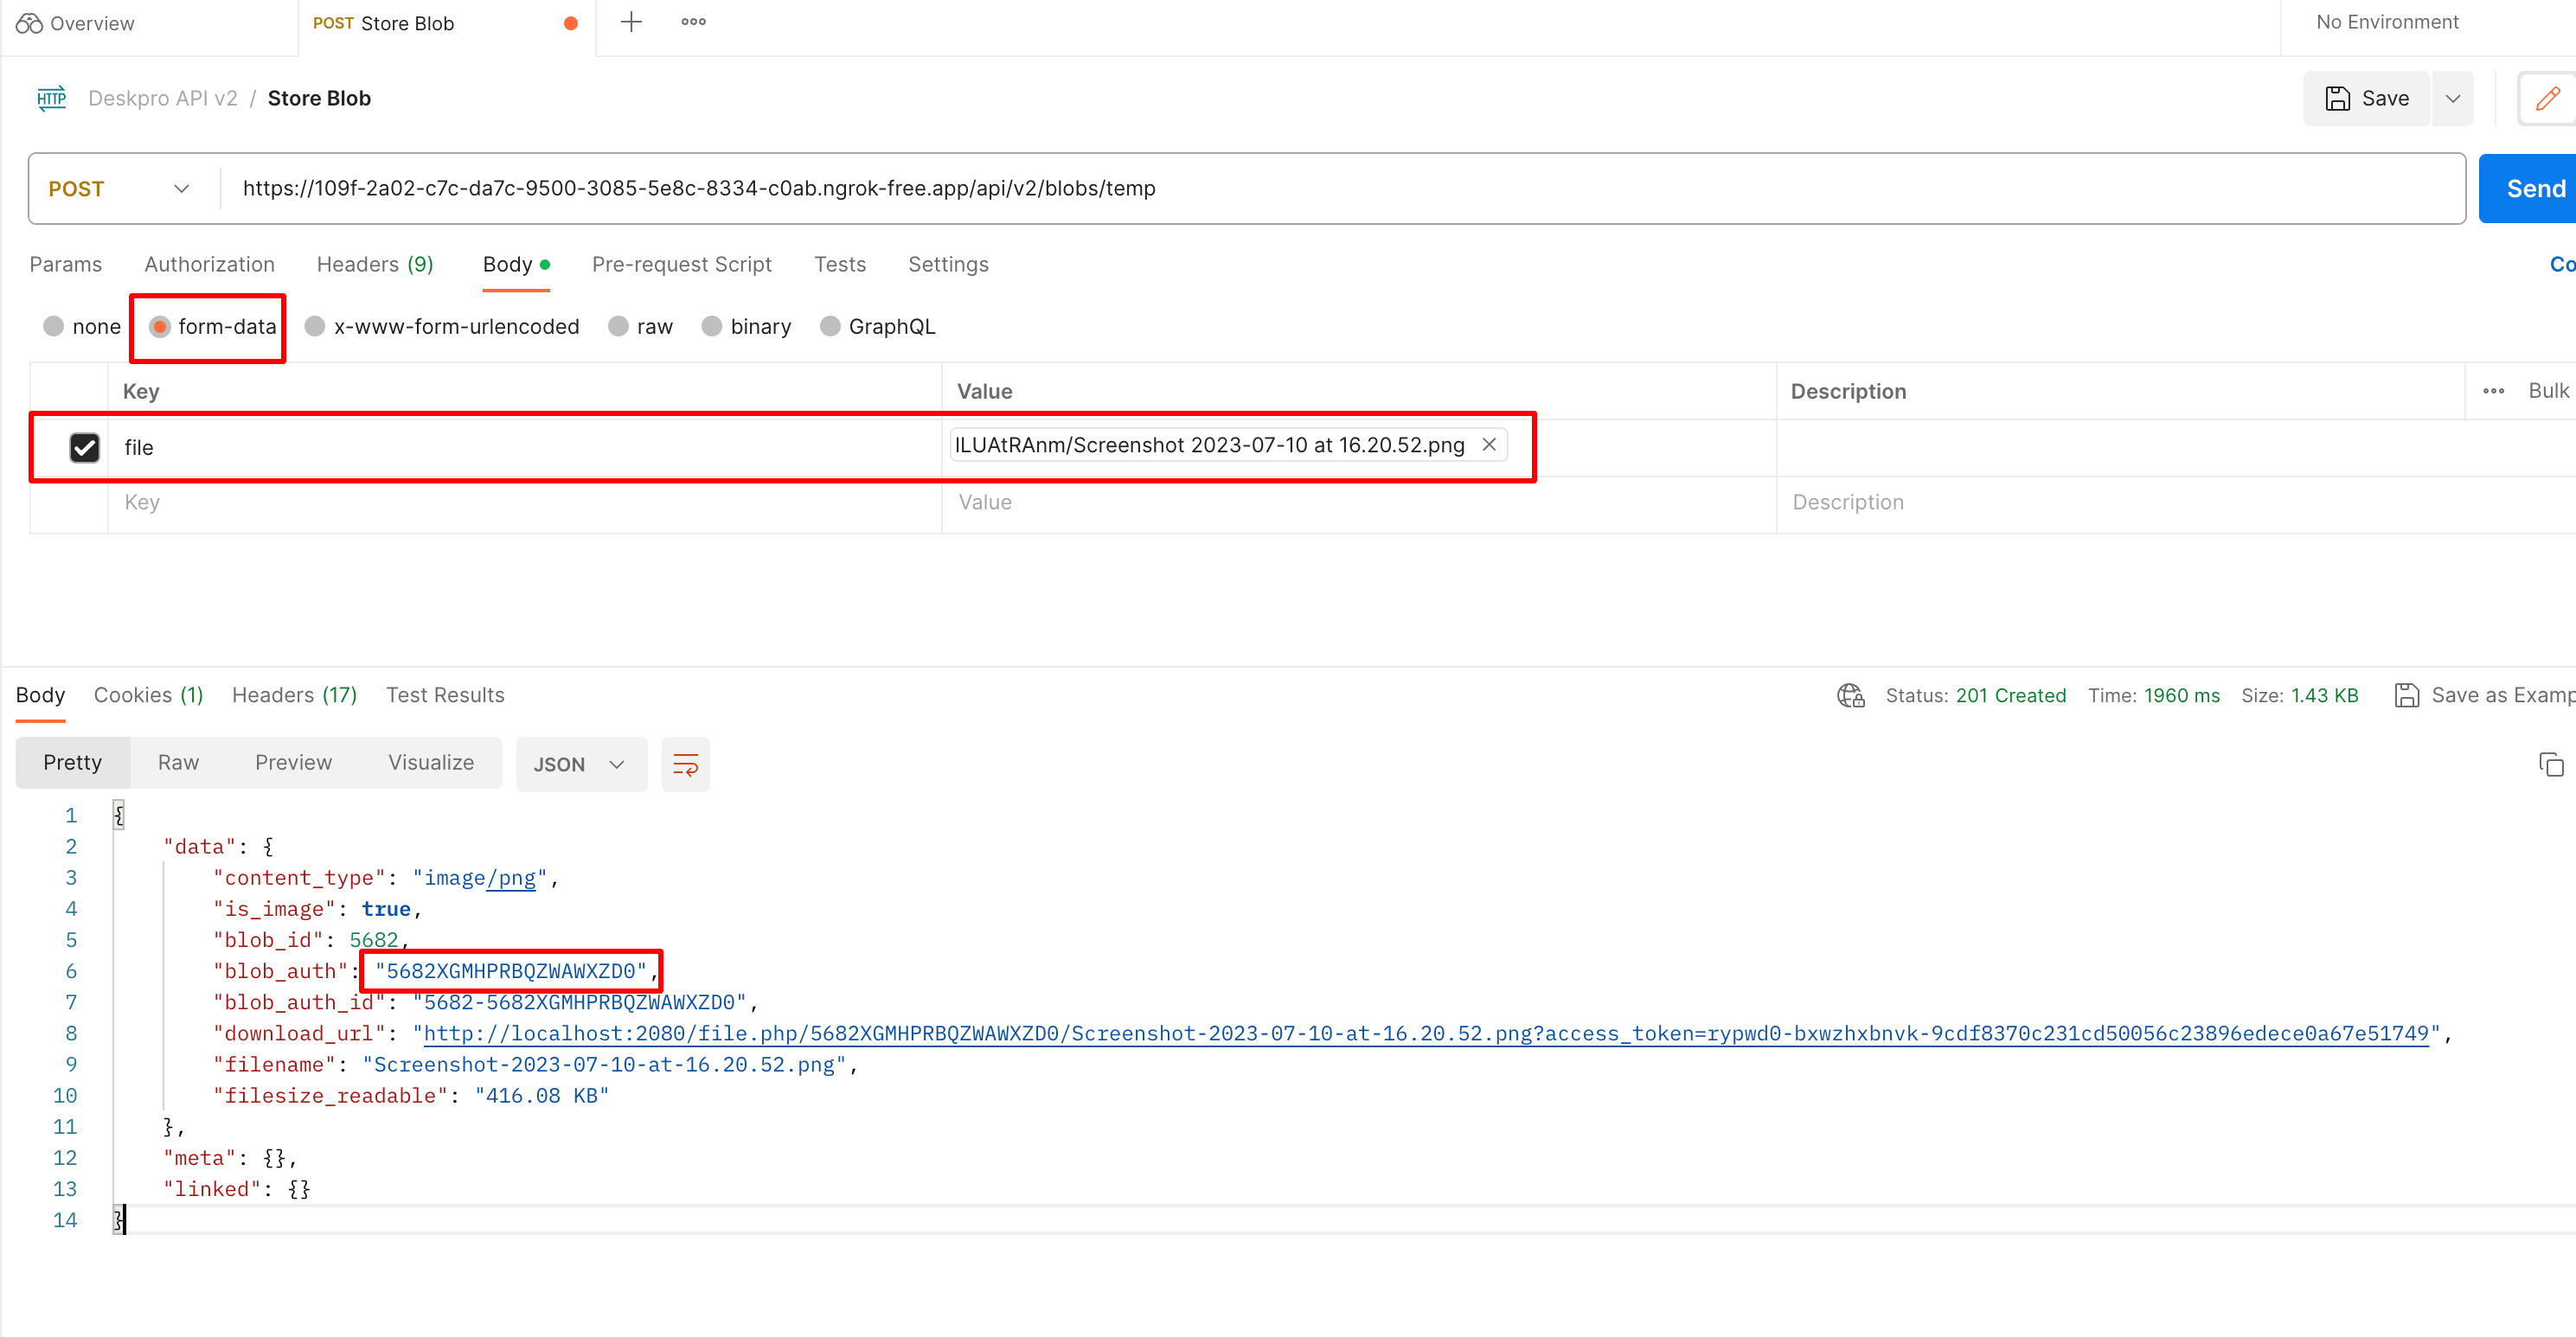
Once your attachment has been uploaded as a blob, Deskpro will return an "Auth Code", seen in the above example as the property "blob_auth". You can now use this in the next step when creatingf a new ticket.
POST https://my-helpdesk.deskpro.com/api/v2/tickets
Content-Type: application/json
Authorization: key 4:G24M3K6Y3R3H8DN9B6QGH3NW4
{"subject": "My First Ticket",
"person": "joanne.bloggs@example.com",
"message": {
"message": "<p>This is a rich <b>HTML</b> message</p>",
"format": "html",
"attachments": [{
"blob_auth": "3AAAAAAAAAAAAAAA0",
"is_inline": false
}]
}
}
Note that the "is_inline" property is set to false, this means that the file is attached to the message and not inline with its content.
Assigning a Ticket
To assign a ticket to an agent, you must first find the agent's ID. You can either find this in Deskpro itself alongside the agent, or you can get all agents from the API. below is a screenshot of where to locate the ID of an agent in the Admin > Agents > Agent Profiles section of Deskpro.

To fetch a collection of agents from the Deskpro API you can make the following request:
GET https://my-helpdesk.deskpro.com/api/v2/agents
Accept: application/json
Authorization: key 4:G24M3K6Y3R3H8DN9B6QGH3NW4
The response will contain a colelction of agents, including their IDs.
Next, let's update our existing ticket to assign the agent. You can do this by calling the update ticket endpoint as follows:
PUT https://my-helpdesk.deskpro.com/api/v2/tickets/321
Content-Type: application/json
Authorization: key 4:G24M3K6Y3R3H8DN9B6QGH3NW4
{"agent": 42
}
The request above assigns the ticket with ID "321" to the agent with ID "42"
Ticket Status Filtering
By default, when retrieving tickets through the Deskpro API (including list and queue endpoints), only active tickets are returned. This behaviour helps improve performance for large databases.
Active tickets include those with the following statuses:
live, awaiting_agent, awaiting_user, and pending.
Inactive tickets include:
resolved, archived, and hidden (with spam and deleted being sub-statuses of hidden).
If you do not include a status parameter in your request, the API will only return active tickets.
When you explicitly request an inactive status (for example, status=resolved), the API automatically switches to all-mode, meaning it will include tickets that match both active and inactive statuses based on your query.
Examples:
Retrieve only active tickets (default):
GET /api/v2/tickets?date_created=2019-06-16T23:01:13Z--2020-04-07T15:23:30Z
Retrieve resolved tickets:
GET /api/v2/tickets?date_created=2019-06-16T23:01:13Z--2020-04-07T15:23:30Z&status=resolved
You can find many other endpoints in our API reference document.